/* */ Beulah Bee: Collage Paper
Showing posts with label Collage Paper. Show all posts

March 14, 2023

Madame Grès

As always, I'm constantly inspired by vintage images. This one is a gown by Madame Grès, a Paris fashion designer known as the queen of drapery.

After printing, I fussy-cut the outline and pasted it over various collage bits: The inside of a business envelope, Collage Paper and Paper Stash scraps. The text was cut from a book.

The tints came from inks, the edges were distressed and the figure outlined in black for dimension.

As always, I hope this post finds you well and happy and I appreciate your visit.

Until next time, take care.

February 10, 2023

Valentine Love

My card-making friend, Thelma, always mails a large batch of her handmade Valentine's Day cards to Loveland, Colorado, each year, where they receive a special postmark before forwarding to the recipients.

A special poem is also stamped on the envelope--here is what was on mine this year:

Travel by train, by letter or card,

My love note will find you, wherever you are.

Via Sweetheart City my message departs

And speeds on its journey straight to your heart.


The card above is what I'll be sending to her. It's made with Idea-ology lace, Botanical collage paper, paper stash, a scrap of fabric and lots of Stickles and Nuvo Crystal Drops.

I'm linking up to Simon's Monday challenge, "Love is in the Air."

As always, I hope this post finds you well and happy and I appreciate your visit.

Until next time, take care.


December 21, 2022

No. 10 for Christmas, 2022

Today, I'm sharing a nature-themed Christmas tag made with a fussy-cut bird from a Graphic 45 paper collection, mounted inside a handmade box lined with Christmas/Noel collage paper, and a piece of Tim Holtz Christmas ephemera.

The background was embossed with a Texture Fade, there's lots of Stickles, a bit of gold paint, a tiny scrap of muslin and a vintage button. I just don't do bows well so to balance the top I created a tiny paper scroll.

As always, I hope this post finds you well and happy and I appreciate your visit.

Until next time, take care.

August 31, 2022

Seedless Preserves

I usually keep my posts short and sweet since there are many craft bloggers that provide step-outs with detailed instructions and most of my work isn't, as they say, "rocket-science."

But this time I thought my readers might like a more detailed explanation of how this tag was made.

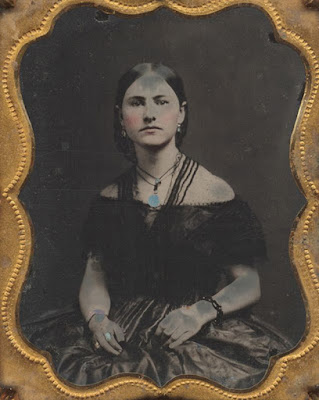
It began with an image transfer on heavyweight card stock after modifying this photo with Photoshop.

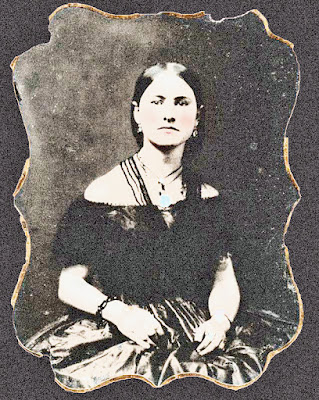
As you can see, the photo had damage (gray areas on flesh) that I corrected using the "film grain" filter followed by my usual image transfer technique. Here's the reversed image after editing.

I filled-in the hair on top of her head, redrew parts of her necklace and extended her eyebrows with waterproof black ink. I use a Uni-ball Vision Fine--it's been my go to for years. I scratched out the dark shadow beneath her chin and replaced it with lighter shading.

I trimmed and pasted tissue paper in the background using Tim Holtz Collage Papers and a Simon Craft Glue Stick. I seriously like these sticks--they have a long working time and clean up easy with water.

Her dress was decorated with plain white tissue paper stamped with dots (Tim Holtz Dots and Floral) and tinted with this post's title, Seedless Preserves Distress Stain. I don't think there is a more potent color in my toolbox than this one!

I made a mask of the woman's body so I could stamp the tree branches with birds in the background (Penny Black Winter Ledge). I painted over the bird bodies with white acrylic later tinted with light brown ink. I used inexpensive Pentel Oil Pastels to tint the background. They are mostly transparent (which is a great feature) and I just scribble on a bit and rub-in with a cosmetic sponge.

Some final tweeks include shading around the edges of the woman's face and arms to provide a little dimension and the addition of gold paint to her jewelry and the remaining frames edges. There's a spot of Glossy Accents on her turquoise medallion and the text is a Holtz Clippings Sticker.

I'm linking up to Simon's Monday challenge, this week it's Make Your Own Background.

As always, I hope this post finds you well and happy and I appreciate your visit.

Until next time, take care.

August 27, 2022

Love This Life

Greeting Card

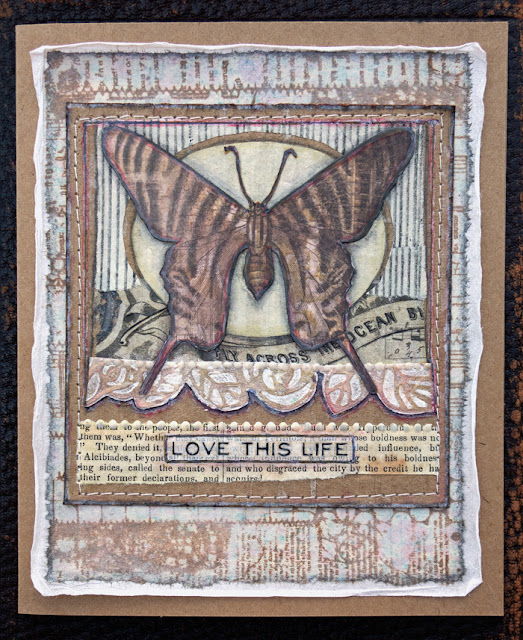
Prompted by Simon's Monday challenge (Mixed Media), I made a card using kraft cardstock, layers of tissue papers (one stamped), a piece of delaminated cardboard, book paper, Tim Holtz Aviary Collage Paper, an embossed scrap (Roses Texture Fade) and the centerpiece is a moth clipped from the Wallflower paper stash.

I save most scraps from previous projects because they always come in handy for projects like this. 

I used a variety of inks and markers to tint/distress and embellished with a Remnant Rub, machine stitching and Nuvo Vintage Drops.

As always, I hope this post finds you well and happy and I appreciate your visit.

Until next time, take care.

Stamp credit: Carabelle Studio Stitched Mixed Media Background

July 23, 2022

Bird Post


I inherited my great Aunt Esther's collection of post cards and I used a pair of them to create a bit of mail art with some Stampendous birds.

One bird was stamped on plain tissue paper, the other on a vintage book page, and both were cut-out and pasted on the cards. I did this mainly because I could play around with the placement and avoid a mis-stamp that can't be undone. The pine trees and leafy dots were also done this way.

There's a bit of collage paper and miscellaneous stamping to fill things in and I tinted with colored pencils and ink markers.

I was inspired to make these by Simon's challenge this week, "Let's Go On Vacation!"

Both cards were mailed by Esther's sister while traveling through St. Louis (on vacation) and of course, birds are great travelers, too. 

Fun to see Ada was excited to report she procured a hotel room with a bath for $1.50.

My, how times have changed....

As always, I hope this post finds you well and happy and I appreciate your visit.

Until next time, take care.
October 31, 2021

Remind Me

Happy Halloween, everyone. No carved pumpkins or kids collecting candy at my house this year but my spirit remains "creepy" just the same.

Sharing a tag made of collage bits and stamping (mostly Tim Holtz) and this link to a short essay that I found particularly inspiring today.

As always, I hope this post finds you well and happy and I appreciate your visit.

Until next time, take care.
October 24, 2021

Strange Rumors

An image transfer, book text/paper, postal scraps, along with paper and rub-ons from Tim Holtz are the ingredients used to make this piece. I've also used Simon's dot stencil with texture paste, Scribbles (3D-paint) and inks for tinting. And I've completed it just in time to link-up with Simon's Halloween challenge!

As always, I hope this post finds you well and happy and I appreciate your visit.

Until next time, take care.

July 10, 2021

Cielito

Greeting Card

Until last year, I always struggled to find dark-toned printed scrapbook paper (it seems to me that, generally, most papers tend to be on the lighter side). Then Tim Holtz released an 8" x 8" Paper Stash called Abandoned and it's become an all-time favorite.

The background for this card was made with a page from the collection.

Greeting Card

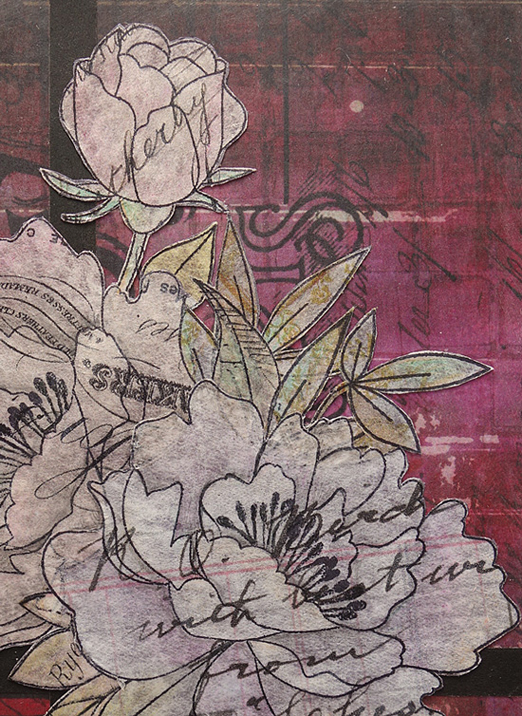
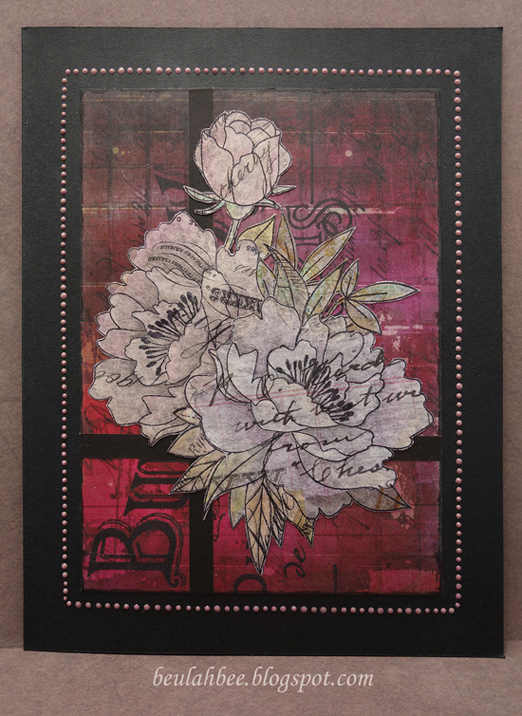
The flowers were stamped (Simon Delicate Flowers) on Tim Holtz printed collage paper (Typography) then fussy-cut and tinted with colored pencils. The border was made with Nuvo Vintage Drops.

When I make a greeting card, I like to add the sentiment later depending on the occasion for giving. The dark magenta color gives this one a somber vibe so maybe a sympathy card? It also would make a good Valentine.

As always, I hope this post finds you well and happy and I appreciate your visit.

Until next time, take care.

June 18, 2021

cresc. a poco.


Making some delicate floral book paper die cuts was the starting point for this tag, they were pasted over a scrap of printed tissue paper using a background of polka dots.

The bird image (which would make a fine stamp) was found at the British Library (here's the link) and sits on another scrap of tissue paper in the foreground.

I adjusted the values using Distress ink and colored pencils to provide stronger contrast and depth and the text is from some vintage sheet music.

I'm linking up with Simon's Monday challenge, the theme this week is "Beautiful Flowers."

For those of you who get my posts via email, I've changed the service that delivers them so please let me know if you have any issues. There's a new subscription box in the side bar for anyone new who might wish to receive them this way.

As always, I hope this post finds you well and happy and I appreciate your visit.

Until next time, take care.

July 19, 2020

Grace Notes


"Early Bird" was Simon's Monday challenge this week but I'm no early bird as I only managed to get this done just before the deadline!

I used a bird stamp (Penny Black Just Looking) that I've had for quite a while but always had trouble using. A search turned up a technique (thanks, Mimi) that helped me figure this one out and then I assembled it with various papers to make a card.

Ingredients include Collage Paper, Clipping Stickers, vintage sheet music, paper scraps and a ribbon. I machine-stitched the borders and used Distress ink to age the papers.

As always, I hope this post finds you well and happy and I appreciate your visit.

Until next time, take care.

June 14, 2020

Girlfriend


I would say my greeting cards look a lot like the tags I make, or a journal page, for that matter. Here I have assembled one using a hand-cut botanical print, a Found Relative and some Collage Paper (Tim Holtz) onto a book page stamped with a French postage mark. I machine-stitched a border and embellished it with 3D paint (Liquid Pearls).

Everything was tinted with Distress inks and I used a watered-down layer of off-white paint over the girls dresses to change their appearance.


I think a key element in this composition is the addition of dark shading behind the girls which gives it some dimension. And it was mounted onto a kraft paper card base which reinforces the vintage vibe.

As always, I hope this post finds you well and happy and I appreciate your visit.

Until next time, take care.
October 31, 2019

Unrequited Love


I've got a lot of pics to share today that illustrate the steps I took to create this journal page made for Simon's Monday challenge this week.

Art journaling can be/should be somewhat spontaneous and you'll see by the process that unfolded for this page, nothing was set in stone and I changed directions a few times.

Being flexible and just "going with the flow" is what makes the experience fun. Not to mention what you might learn along the way!

I began with transcribing a document then pasted word strips cut from it onto the page.

I covered the page with gesso and tinted some sections with gray then sanded it a bit.

I transcribed the last paragraph of my document over the top using a Fude Ball 1.5 pen.

The ink was taking FOREVER to dry so I sprinkled clear embossing powder on it and heat-set. It was messy but did the trick and I like the emphasis and durability it provided.

I used a vintage stamping set (circa 2008) and applied the flowers with black archival ink.

I wanted to create the illusion of flowers growing over and around a brick wall so I printed a photo of some brick, tore out sections and used my image transfer technique.

As you can see, the wall was modified quite a bit later in the process but proved to be a good jumping-off point which was just what I needed.

I used shades of gray to blend in the wall and began to tint the page with craft paints.

I didn't worry too much about "staying inside the lines" but the paint did blur the stamping so I went over the lines with a black pen marker.

Here's the finished product--it's a two-page spread in a Ranger Dylusions journal (8" x 11"):

Some details I didn't photograph but are worth mentioning: I used the Dot Fade stencil and white paint to unify the page and added the butterfly (cut from Tissue Wrap) along with some Collage Paper leaves (Tim Holtz products).

September 24, 2019

Summer Mind


While yesterday was the first day of fall, my mind and my heart will stay in summer for many months to come.

Living in the desert means hibernating during the heat of June through September but when the temperature breaks in the fall, activity-wise it's more like the summer everyone else was having. Festivals begin, strolls through the neighborhood are possible again and sitting out on the porch--a long-lost luxury.

So yes, I'm in a "summer state of mind" and that was my inspiration for this tag.

I'll describe the layers:

  • Calligraphic scrapbook paper (Authentique Classique: Pretty) cut in the shape of a tag was tinted with Distress Oxides.
  • Botanical collage paper was pasted over the top and the flower petals and leaves were filled-in with gesso.
  • The bug is from the Stampers Anonymous Entomology set and was stamped with black archival ink. The wings were also filled-in with gesso using a tiny brush.
  • The gessoed areas were painted with inks. Besides helping with adhesion, the gesso makes the colors more vibrant.
  • The text was cut from an old book.
  • I think most tags need a border to frame it and machine stitching around the edges was used for that purpose here.
I'm linking up to Simon's Monday challenge--the theme this week is stitching and also to The Funkie Junkie Boutique whose challenge is to make a tag.

Look for me on TFJB later this week where I'll have a guest spot and a fun project to share. Thanks for stopping by!

May 29, 2019

Perfectly Happy


I was inspired by a post at Vintage Everyday that featured wedding photos during WWII and I used one of them for this tag.

It was framed for Simon's Monday challenge this week and also features a Hero Arts stamp from 2007 called Lace Flower Cluster which I used especially for their 45th anniversary Show & Tell Celebration.


After stamping, the lace flower was cut out and embellished with lines from a white Gelly Roll pen. I altered a Tim Holtz lace frame by peeling it from its baseboard backing, trimmed its shape a little and applied dots of Liquid Pearls to the edges. The background was made with Collage Paper.

May 12, 2019

The Way


During an evening walk a few weeks back, I found a rusty, gold painted piece of metal (shaped like a wing?) which someone had tucked into a street sign in my neighborhood.

It was happenstance that I glanced-up at just the right time with just the right light to see it's shiny reflection and to know it was there.


And so I used it for a small plaque made with various papers (vintage book, Tim Holtz collage and butterflies cut from Prima scrapbook paper). The flowers are from the new Idea-ology Botanical Layers and the girl is a Baseboard Doll.

I used a bit of crackle medium around the edges, drew some lines and added shading to create a faux border, and trimmed the plaque edges with gold paint. The text was an image transfer.

I began work on this Monday when I discovered the Simon Monday challenge was "Add Something Metallic." Since this metal piece had been laying around my studio for awhile (with no idea of how or what to use it for), this challenge was just the push I needed.

I didn't think I'd get it done in time to enter but sure enough, I did!

April 12, 2019

Maurice Crooks


My Great Aunt Esther took a photo of a neighbor whose family was homesteading in Newcastle, Wyoming. She wrote his name and the date on the back--Maurice Crooks, August, 1921.

I made a copy of that photo and used gel medium to transfer the image onto a manila tag.


Then I used gesso to white-out some areas, blending the edges of the photo into the background.


Then I went about stamping and tinting and embellishing and came up with what you see here.


I know it's best not to put the focal point of a composition directly in the middle, but in this case, I threw caution to the wind since Maurice seemed to stand so proudly right in the middle of his family's meager garden.

I'm linking to Simon, the Monday challenge is "Down on the Farm."

October 25, 2018

Few Passed Them


Here's a post about the way I used Plain Collage Paper (Ideaology) to create a mirror image of a stamp and how to reduce transparency by painting on the back side.

I'm linking up to Simon's Monday challenge--this week's theme is Halloween.

The background is made from various paper scraps tinted with Distress inks and the gate (yes, I know it's upside down) is a die-cut from Tim Holtz called Gothic Gate.

The house and skull are stamp images from a 2016 set called Mini Halloween 5 and the kids are a classic called Photo Studio (Tim Holtz).

I used some words from Ideaology Clippings Stickers and tinted a tiny diamond with red alcohol ink.

As you can see, the house is single-sided but I wanted to create something a little different.


So I stamped the image on Plain Collage Paper then turned it over and stamped the image again on the backside to create a mirror image. They were trimmed and pasted together to create the larger house.


The family was also stamped on the Plain Collage Paper but I painted the backside with off-white paint to reduce the transparency to make sure the facial features didn't get lost. Once the image was pasted down, I used inks to lightly tint it.


I really like the properties of this collage paper and plan to stock-up in case it's discontinued as I have been using it a lot!

October 04, 2018

Two Days


Collage play with scraps on a manila tag and my way of preserving a quote that I like. I'm linking up to Simon's Monday challenge because this week it's all about tags.

October 03, 2018

One-Cent Flora


I hope to make several tags this week and link-up to Simon's Monday challenge because I love to make tags. If you haven't seen my flipcard blog, manilaguerilla.blogspot.com, it's where I file them and you can change the view to any format you like (the "Mosaic" view is pretty cool, too).

This tag is clean and simple and here's what I used to make it: Prima Epiphany paper, Idea-ology Aviary collage paper, and stamps by Heidi Swapp and Tim Holtz.

This is the first time using the Aviary paper and the birds are a little blurry/fuzzy. I don't know if this is by design (Tim does like the distressed look) or if I just got a less than perfect batch and I wish the images were sharper. Even so, I love this new paper (I already have the Botanical and Plain versions) and I highly recommend it if you like to do collages.