/* */ Beulah Bee: 12 Tags for Christmas
Showing posts with label 12 Tags for Christmas. Show all posts

December 18, 2019

12 Tags for Christmas 2019 - Believe in the Magic


So, all it takes is a prompt from Simon's Monday challenge and I'm off! This week's theme is "Cityscape" (add some buildings) and that was the inspiration for tag number eight.

The building image (Carabelle Studio Dans la Rue) was stamped on old book paper, tinted with inks and colored pencils then embellished with dimensional dots painted and glittered to look like Christmas string lights.


The little miss was cut from a Found Relative (Tim Holtz) and the kitty looks just like Howie, my cat, who turned 18 this month. It's Christmas everyday for this little guy who I spoil beyond belief!

December 13, 2019

12 Tags for Christmas 2019 - Snow Berries


I've got carols a' playing as I prepare this post (David Archuleta's "Winter in the Air") and I am grateful for this time to play and for music of all kinds that I simply couldn't live without.

Stamping of holly berries (Mondo Holly by Julie Ebersole) on watercolored paper along with a bird cut from the Tim Holtz Wallflower paper stash, snow flakes courtesy of a Simon stencil--that's what I used to make tag number 7 of 12 for 2019.


I thought you might appreciate the technique I used for masking and alignment of my stamping so here's a photo to illustrate.


I taped together the masks, laid them on the tag and used an ink blending tool and light colored ink to tap along the mask edges to create an outline I could use to accurately align my stamping.

I'm linking this post to the TFJB Challenge Blog: It's the Holidays.

Use the link on the sidebar or the 12 Tags label at the bottom of the page if you want to see more of my Christmas tags.


December 08, 2019

12 Tags for Christmas 2019 - Christmastide


We've had a really rainy weekend here in the desert which made for a good time to get cozy in the craft room and make another Christmas tag.

I was channeling a vintage vibe with this one and used a page from an old German bible along with some fussy-cut paper from Graphic 45.


It was embellished with glitter glue, Glossy Accents and machine stitching and I used my typewriter for the text. I needed something to fill-in the bottom area and used a Stamp Collector stamp (Tim Holtz).

There's time to link yet again to Simon's Monday challenge for this week's "Let's Sparkle" theme.

December 07, 2019

12 Tags for Christmas 2019 - Happiness & Cheer


This one is made of a black cardstock background covered with poinsettia die-cuts (Tim Holtz) and embellished with tints and glitter glues.

This was truly a learning experience: It's hard to cut thin papers with intricate dies (you can't get the design out without tearing it) so, thanks to Google, I learned about using dryer sheets or waxed paper which helped a lot.

Also, it was the first time making my own glitter glue. I needed red but didn't have anything but the loose stuff and an empty Stickles container (you must save these--they are SO useful).

The mix was approx. 3/4 glitter to 1/4 fluid medium and I have to say it worked well.


This was a fun tag to make because I went kind of glitter-crazy and it's perfect for linking up to Simon's Monday challenge this week which is "Let's Sparkle."

December 02, 2019

12 Tags for Christmas 2019 - Be Good


Underneath the many layers of tints, texture paste and crackle medium is a mixed media die-cut (Tim Holtz) fashioned from brown card stock.

The frame is a Spellbinders die-cut covered with dimensional paint (Scribbles) which was also used on the large text (an image transfer).

Inside the frame is a Photobooth image (Tim Holtz), I used dots of Scribbles and Stickles (glitter glue) for bling and a strip of washi tape to balance out the intentional off-center placement of frame and text.


It will be easy to link-up with Simon's Monday challenge this week as I work through more of my holiday tags. The theme is "Let's Sparkle" and I've never made a Christmas tag EVER without using glitter--it just wouldn't be Christmas without it!

November 26, 2019

12 Tags for Christmas 2019 - Pine Grosbeak


The idea for this third Christmas tag for 2019 was a happy accident that I followed through on with a few deviations in between.  Let me explain.

I die-cut the holly (Tim Holtz Mixed Media Christmas) from a book page and placed it on top of some paper scraps. One of them was an enlarged half-tone image from a vintage book and I thought the various dots peaking through looked cool so I decided to use it.

The bird was cut from a vintage book. It was originally black and white and I added color with red ink and collaged over the branches. I've never seen this bird myself but they live in colder climates. Imagine coming across one foraging in the snow! I love birds :-)

I created an oval with dimensional paint drops (Scribbles) and painted over the outside section to create the vignette.

I distressed it with sanding, added the washi tape and a Remnant Rub and then made it an official Christmas tag by embellishing it with platinum Stickles.


I'm linking to Simon's "Tape It Up" Monday challenge.

Here's a link to Christmas tags from previous years if you'd like to see more (or use the link in the label section below).

November 24, 2019

12 Tags for Christmas 2019 - Twinkle


Making Christmas tag number two was a bit like decorating a cake! And since I used vintage buttons, I'm linking this one to Simon's Recycle challenge this week.


I began with a tag shape cut from some Tim Holtz Halloween paper (Abandoned) then I inked snowflake stencils with Versamark and embossed the shapes with clear powder.


The next step was to use a resist technique where you paint (or in this case, gesso'd) over the embossing and let it dry only slightly before wiping the paint off the embossed areas. Don't expect perfection with this technique--it's really meant for a distressed look.


My great Aunt Esther snipped many a button from her frocks over the years and I inherited quite a collection. I keep the little white buttons in one box and have another, bigger box with colored buttons in larger sizes. I gathered up an assortment and pasted them on.


I lightly tinted the background with Faded Jeans Distress Oxide and frosted the cake tag with glitter glues and dimensional paint (Scribbles and Stickles).


I always feel my tags need some kind of border. Since I used buttons, I reinforced the sewing theme by machine-stitching a mini zig-zag with green thread.

Stayed tuned for more tags--I appear to be on a roll--ha! Hope it lasts :-)

If you want to see my tags from Christmas pasts, here's a link.

November 21, 2019

12 Tags for Christmas 2019 - Father Christmas


My first Christmas tag of the year features a vintage image of Santa mounted on kraft card stock and embossed with gold polka dots.

This close-up shows the glitter I applied on the banner, around the oval and on the tree branches.


I'm linking this post to Simon this week because the theme is "Recycle" and I've included some photos to explain.


The tag was made from the back of an empty drawing paper pad (I save all quality cardboard just for this purpose).


I pasted my laser-printed image onto some packaging material before cutting it out. The material had a slick surface so to make sure I got a good bond using my glue stick, I sanded the surface before applying the image.


And finally, I like to use scraps of craft foam sheets when I want to lift an image from the surface to create some dimension. I just cut it to size and use some glue.

Look for more Christmas tags in the days and weeks to come (it's only 34 days away) and if you'd like to see more tags from previous years, here's a link.

December 24, 2018

12 Tags for Christmas 2018 - Tag No. 12


Good people all, this Christmas time,
Consider well and bear in mind
What our good God for us has done
In sending his beloved son
With Mary holy we should pray,
To God with love this Christmas Day
In Bethlehem upon that morn,
There was a blessed Messiah born.

(The Wexford Carol)

May the spirit of the season bring you peace and joy.

Thank you for being a part of my artful journey this year.

Merry Christmas and Happy New Year!

December 18, 2018

12 Tags for Christmas 2018 - No. 10 & 11


I'm still looking back to Christmas tags from the past and I've saved some of my very favorite tags for when we get closer to Christmas. This is one of them.

The background is made from mulberry papers and the tree was hand-cut out of kraft paper that had been randomly stamped and embossed to create texture. I added the tinsel using glitter glue and a white gel pen.

The text was cut from a recycled store-bought Christmas card and illustrates just how far I will go when it comes to fussy-cutting. Crazy I know but I loved the style of the lettering and I was several years away from owning a die-cut machine.  Since the text was wider than the tag, I just let it bow out when I attached it to the bottom of the tag.


This one's a favorite because of the Thomas Nast Santa (an image transfer). It's an early example of learning how to blend Distress inks, how to emboss (the white scrolls) and how to use masks when stamping.

If you don't recognize the kind of stamps I used at the bottom of the tag they are called Christmas Seals. I inherited a small collection from my Great Aunt Esther, they're a terrific embellishment--I must remember to use them more often!

December 12, 2018

12 Tags for Christmas 2018 - No. 8 & 9


How seriously crazy funny was I about making Christmas tags?!
(Okay, perhaps I still am....)

For this look back at tags from Christmas past, I present one that was inspired by the movie, A Christmas Story.  That's my Uncle Steve sitting on Santa's lap and I made black paper look like film strip by cutting out tiny black squares. The metal rimmed tag was hand made and I found an advertisement for the Daisy Air Rifle and used it for the background.

None of this would have been possible without my laser printer and, of course, the internet as a source for the images.


I'm sharing this tag with you because it shows a way to get more mileage out of a background stamp.

This one is by Tim Holtz and is called Christmas Collage. I think this design/pattern would make terrific wrapping paper.

December 05, 2018

12 Tags for Christmas 2018 - No. 6 & 7


I'm doing a look-back to Christmas tags of the past (see previous post) and this one was inspired by a crackling technique Tim demonstrated on one of his early tags.

I was probably listening to the Nutcracker Ballet when I thought of the design 😏 and, with a very limited amount of crafting supplies back then, I found a pattern for the ballerina and cut her out of card stock by hand.


The background stamp is the classic Tim Holtz Flourish and I may have hand-drawn the numerals. The snowflake sequins were dabbled with paint and glitter and a ribbon was used for the ballerina's tutu.

I am sharing this next tag for a remarkable feature that looks excellent in person but impossible to capture in a photo. Let me explain.


Santa's face is a clip-art photo that was printed onto a transparency (used with an overhead projector in the "old days" for business meetings). Then I placed the image in front of a sheet of metallic silver paper before I set it into the frame.

The effect is truly astonishing and the image takes on a vintage quality similar to that of mercury glass. It's hard to describe but I highly recommend trying this technique so you can see what I mean.


I'm linking this post to Simon's Monday Challenge Blog ("B is for Ballerina").

November 28, 2018

12 Tags for Christmas 2018 - No. 4 & 5

I started making tags when I discovered Tim Holtz and his blog at the beginning of December 2009 and got caught up in his daily posts for the 12 Tags of Christmas.

I had little experience stamping, didn't know about Distress inks, and his tutorials were very detailed and very helpful. I was mesmerized and I was hooked.

Tim has kept links to these posts on the sidebar of his blog and I recommend them to paper crafting beginners as a learning tool--they are so much fun!

I've decided to share a few of the tags I made during this period (before Beulah Bee) because I'm a little short on time this year and won't be able to complete all 12 new ones.


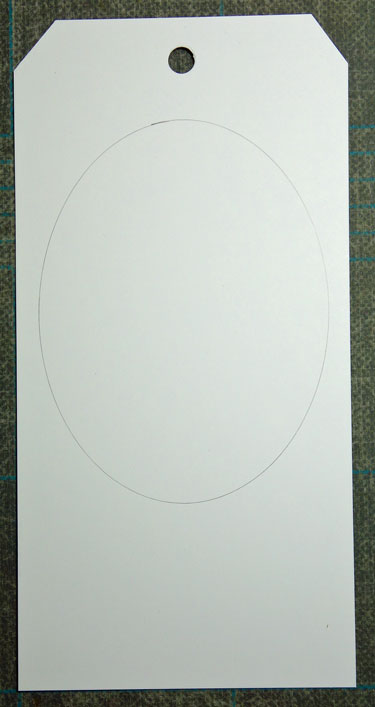
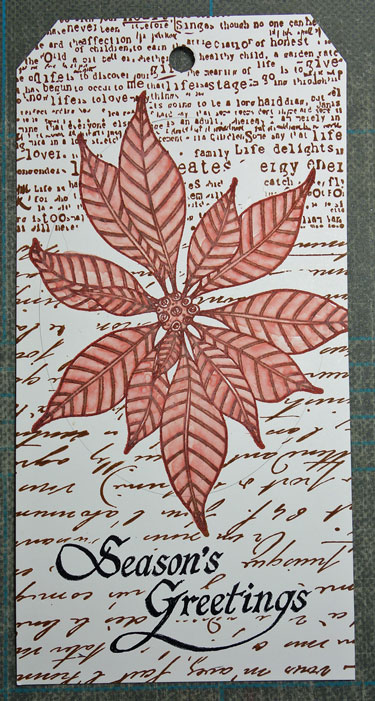
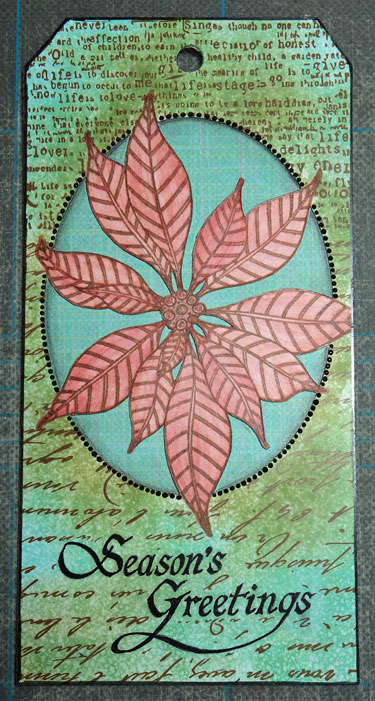
This one shows my penchant for paper-cutting even back then but before I learned to tint the cut paper edges with a darker shade of ink (so they would blend in better). Scraps of pages from an old German bible were pasted on the background.


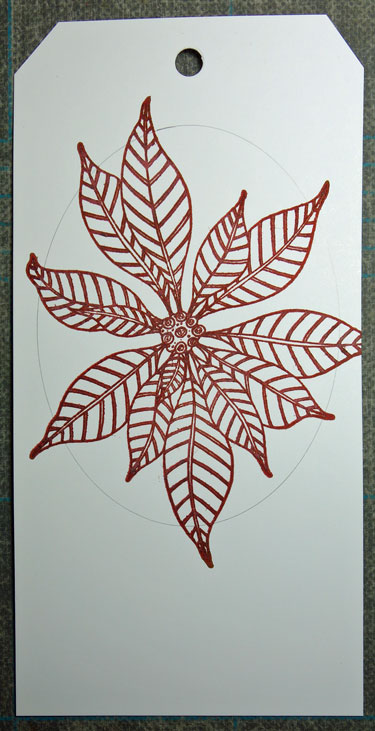
I used the same image on this tag (photocopied from a vintage greeting card that belonged to my Great Aunt Esther) and embellished it with a stamp embossed frame using antique gold powder.

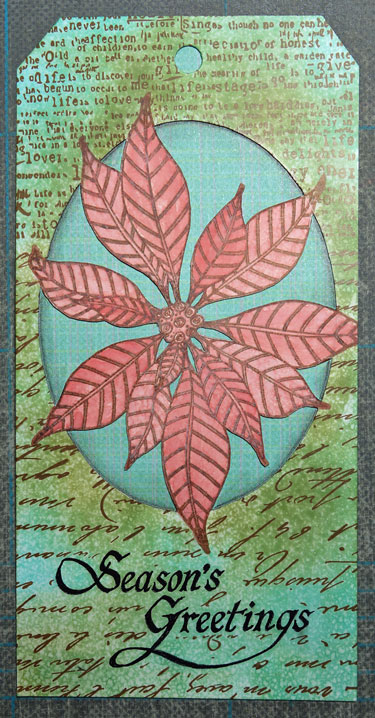
The background is Tim Holtz kraft card stock and the tiny stars were recycled from a store-bought card and tinted with alcohol ink.

I could never have imagined back in 2009 that this year I'd be short on time making tags because of working on projects for Tim's Idea-ology booth at the January 2019 Creativation trade show!

What a journey (thanks, Tim)!

There are links in the sidebar to my Creativation/CHA projects or Christmas tags from past years.

November 23, 2018

12 Tags for Christmas 2018 - No. 3


I've used another Penny Black stamp called Tree of Holly for this tag and I'm linking to their Creative Christmas Challenge and also to Simon's Monday Challenge for the "Let It Snow" theme.

I used embossing ink and silver powder for stamping then filled in the tree with the juiciest, most powerful purple in my arsenal of crafting supplies--Seedless Preserves Distress Stain.

I filled in the holly and berries with paint and glitter, added more bling to the border and placed a Christmas Remnant Rub from a few years back along the bottom.

The snow was made with texture paste and a stencil by Simon Says Stamp called Falling Snow.


To see more of my Christmas tags you can click on the label at the bottom of this post or use the link I've placed in the sidebar.

November 19, 2018

12 Tags for Christmas 2018 - No. 2


May I present Tag No. 2 for this Christmas which I really enjoyed working on in a carefree manner with little or no planning.

I'm happy with the result and it was a good reminder that, too often, I overthink what I make and it gets in the way of fun.


After stamping the bird and text (Penny Black Festive Season) on a virgin manila tag, I used a stencil to trace the tree trunk and branches using a mechanical pencil with fine lead (which made it easier to get into the tiny spots).


Then I went over the pencil lines with a Uni Ball Vision Rollerball pen (Fine Black). I like this pen very much because it never clogs and the ink is waterproof. As you can see, I filled in the tree trunks and branches with additional line work in a loose and sketchy manner.


The background was painted in with watered down blue acrylic and I used colored pencils on the cardinal, berries, and Christmas text.

An oval frame (Tim Holtz Industrious Sticker) was placed around the text and some snow on the branches and other white embellishments were made with paint.


I'm linking this tag to the Penny Black Creative Christmas Challenge and to Simon's Monday Challenge Blog because this week's theme is "Let It Snow."

To see more of my Christmas tags you can click on the label at the bottom of this post or use the link I've placed in the sidebar.

November 11, 2018

12 Tags for Christmas 2018 - No. 1


I've started my tags for Christmas and, with any luck, I'll have twelve completed before December 24 (fingers crossed).

I've had a little trouble with my mojo (or muse as some would call it) so I'm going back to basics to embrace some of the original techniques that influenced my paper crafting journey.

I'm sharing my step-outs for this one, with minimal explanation, so don't hesitate to comment if you have a question about my technique.

And if you'd like to see any of my tags from Christmas past I've put a link to them in the sidebar.

Oval drawn on Speciality Stamping Paper, matt finish (Ranger)

Stamp (Penny Black) with Distress (Fired Brick)

Spread ink with water brush

Stamp greeting (Penny Black) then mask it along with flower

Stamp background with archival ink (Potting Soil)

Rub on Distress inks (Forest Moss, Peacock Feathers) and spritz with water

Cut out oval with X-acto knife.

Re-apply Fired Brick Distress ink to strengthen flower color.
Add a paper background behind flower.

Trim oval with dimensional dots and tag edge with black marker


After I'd cut out the oval, it was fun playing with different papers for the background and I finally settled on a paper that matched the Peacock Feather blues.

I'm linking this to Simon's Monday challenge blog because this week's theme is Make Your Own Background and also to the Penny Black Creative Christmas Challenge.