/* */ Beulah Bee: April 2015

April 25, 2015

All the Flowers

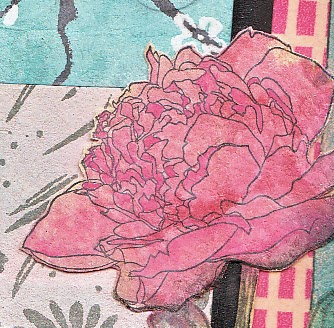
A day spent gardening has produced this journal page
made with stencils, stamps and paint.

Click to Enlarge

It was good exercise, too. Each time I placed an image, I had to go to the sink to wash the paint off my implements and, as you can see by the number of impressions, I made a lot of trips!


The lettering was done with Sakura gelly roll pens which work well over acrylic paint and I highly recommend the Bright White 0.4 mm (medium) point.

One thing's for certain, this type of garden won't ever need water again and my blossoms should last a lifetime.

I'm linking to Art Journal Journey where this month's theme is favorite poems and quotes.

April 24, 2015

Due Date


... and I'm running out of time.

I'm linking this to Simon's Monday Blog Challenge where this week's theme is due date (stamp credits: Tim Holtz and La Blanche).

Here's how I added the text:

I typed the statement in Photoshop, reversed the image and printed it on plain paper. I cut it out, covered it with gel medium, then laid it face-down onto the tag. I let it dry then rubbed off the paper to reveal the transferred text.

For more information on my image transfer techniques, see this post.

April 17, 2015

Freestyle


I have finally tried out the last of the six flowers you get in the Tim Holtz Flower Garden stamp set. I think it's another Peony and it's been altered somewhat (more about this later).

Click to Enlarge
I call this tag Freestyle because that was the attitude I had while making it. I had no plan--I just starting doing stuff.

A bigger bottle would've been better (to keep the proportions right) but it was the only one I had and, anyway, a bigger bottle might mean a bigger tag and then where would it end?

I rather like the overall appearance though and discovered some interesting techniques that are sure to be useful in another project.

I thought I'd share exactly what I did so fasten your seat belts, it's going to be a bumpy ride!

  1. I covered the tag with a page from an old dictionary.
  2. I stamped the bottle, flower and stem with black archival ink keeping ink off one of the large petals near the base to make the flower smaller.
  3. I used colored pencils to create a rainbow-effect in the background.
  4. I used off-white to paint over the text inside the flower petals with a tiny brush.
  5. I stenciled some large script on a piece of deli-paper with black paint.
  6. I laid the deli-paper over the tag, traced the outline of the bottle and flower, cut it out, then pasted the remainder on the tag (leaving the bottle, etc., exposed).
  7. I used a harlequin stamp and archival ink on the background by using the cut-out scraps from my deli paper as a mask.
  8. I softened the edges of the impression with a bit of hand-sanitizer (which works great as an archival ink eraser on non-porous surfaces).
  9. I tinted the flower with dye ink and a water brush and added a light wash of white to the bottle and stem.
  10. I used black and white gel pens to make dots for accent. The black ones didn't dry so I used clear embossing power on them to speed things up and keep them permanent.
  11. I used my Exacto-knife to scrape the edges of the tag, wet them with a brush and then applied black dye ink.
Perhaps a word about deli-paper is in order. I use it for all kinds of things and it makes great paper for collages because it is thin and durable. It reminds me a lot of the same type of paper Tim uses for his tissue wrap.

Now that I've used all the Flower Garden stamps individually, I guess it's time to plant a garden but I'll definitely need to use something larger than a tag. I think I see a journal page in my future!

I'm linking to the Wednesday blog challenge at SSS where this week's theme is make your own background.

April 15, 2015

Middle Ground

Click to Enlarge

mid·dle ground

noun

1. an area of compromise or possible agreement between two extreme positions, especially political ones.

2. the middle distance of a painting or photograph.


I have a journal page for your perusal today made for the express pleasure of experimenting with a new stencil. As you can see, I got a bit carried away but what better way to see just what it can do?


The ladies were cut and pasted down first, then I painted the sky and ground and added the stenciling last. I went back in and adjusted some of the values to try and give it more depth which included adding the lake and mountains in the distance.

This lovely little glass trinket was my inspiration for the slightly unusual tint. Yes, I could have used more traditional landscape colors but I wanted the challenge of trying something different.

I'm linking to Simon's Monday blog challenge where this week's most excellent theme is in the middle.

April 13, 2015

Blue Butterfly


I still have one more Flower Garden stamp to go but, after making five in a row, I needed a break!

So I played around with another new toy instead. It's an adhesive silkscreen from Martha Stewart and it's pretty awesome. It's like a stencil but with way more detail.

I began the tag by using acrylic paint to apply the fern design right smack-dab in the middle. Then I envisioned adding figures on either side, found a photo that would work and did an image transfer. Since image transfers are transparent, I went over the darkest areas of the ferns with some additional green paint to make it more opaque and stand-out better.

I painted in a blue background and added some black lines with a gel pen. I stamped a butterfly with white, then embossed it and painted the insides blue to match the background.

Martha probably didn't expect her stencil to be used this way but, nevertheless, it was good practice and great fun. If anyone's interested in seeing how these work, up-close and personal, let me know in the comments and I'll put together a demo for a future post.

It's pure coincidence, but I'm linking to the Monday blog challenge at Simon Says Stamp because this week's theme is in the middle and that is exactly where my fern ended up!

April 11, 2015

Asteraceae


Here is tag number five in my Flower Garden stamp set series.

The flower is probably in the Asteraceae family, which is huge, and because it starts with the letter A, I can link it to Simon's Monday blog challenge.

Click to Enlarge
I stamped the flower on to some Ranger specialty stamping paper and used distress inks to tint.

Then I cut it out and pasted it to a scrap of watercolor paper along with some stamped tissue paper. Gel pens were used to add lines near the base.

My watercolor paper scraps are from old paintings that didn't pan out.

Since the paper is expensive, I save them because I can always use the backside for testing colors, etc. Who knew one would become the background for a tag?

April 10, 2015

Asian


Some flowers have a strong connection with southeast Asia, such as cherry blossoms, chrysanthemums, and peonies. So I opted for an Asian-inspired look when using the peony stamp from Tim's Flower Garden stamp set.

This also worked out nicely for linking to Simon's Monday blog challenge where this week's theme is the letter A.

Other Asian items used in this tag include the printed mulberry paper background and washi tape. The peonies were stamped on bamboo paper which, because of it's color (bamboo), was lightened with Picket Fence distress stain. Unfortunately, I lost some of the stamp's line detail when I did that. (Note to self: Lighten first, stamp second.)
I wonder if it's fair to count the "Broken China" distress ink which was used on the right side along with a little "Tea Dye"?

This becomes flower number four in my quest to experiment with all six flower types in this stamp set before the week's end. To take a look at the others, just click on the label Flower Garden at the very bottom of this post.

April 09, 2015

Coneflower


Another day, another flower. So glad to have time-off this week to play! I am still experimenting with Tim's new Flower Garden stamp set and I've created tags with three different flowers (three more to go).

Click to Enlarge
I pasted book paper to a tag then stamped my flowers with archival ink.

I used acrylic paint again and polished it off with some Black Soot around the edges and some white splashes.

I'm linking to Simon's Wednesday blog challenge where this week's theme is April Showers/Spring Flowers.

April 08, 2015

B or Z


Bachelor Button or Zinnia? Or perhaps Marigold or some other flower?

I really wish I knew. If there's a flower expert out there, could you please advise, or even better--maybe the designer (Tim, are you listening?) can give me the answer.

These beauties are one of the six different flower blossoms you get with the new Flower Garden stamp set.

I am having so much fun with these, they have amazing detail and I appreciate the fine lines.

This tag was made using a page from the Wallflower paper stash, some acrylic paint and distress inks.

My technique was to stamp the flowers then fill them in with paint and a tiny brush. I enjoy detail-oriented tasks so this was no bother. I just put on some good tunes and get into the zone.

I'm linking to the Wednesday blog challenge at SSS where this week's theme is April Showers/Spring Flowers.

In the desert, any flower (even Summer annuals) can bloom this time of year. But the heat will have them dead and gone by June.

April 05, 2015

Under Cherries


I was blessed with some really good fortune last month as I won a gift certificate from Ellen Hutson which I used to order Tim's new Flower Garden stamp set (it was love at first site).

My luck improved even more when Tim used this stamp set for the April Tag of 2015 and I'm so happy that I have one to use!

I stamped what I think is a cherry or apple blossom on some watercolor canvas that was cut out and pasted to a background made with Tim's Kraft Resist paper. 

I altered the paper background using paint and stamps.

My hand-lettered text was made with a gel pen and comes from this Haiku poem (translated by Asataro Miyamori):

Under cherry-flowers,
None are utter strangers.


Click to Enlarge
I have to say a word about Ellen Hutson because this was my first experience ordering from their site.

I really like their fast shipping policy. They strive to fill your order and ship it within one business day after you place it.

They use USPS Priority Mail so you get it in three days and it comes in a nice sturdy box so nothing gets smashed.

Thanks Ellen (for the gift) and thanks Tim (for what may be my all-time most favorite stamp set ever).

April 03, 2015

Sacred Objects


As my regular visitors know, I make a lot of tags. I don't always post them here because I'm not linking to a challenge and there's nothing special in the technique I used to warrant an explanation. Instead, I just file them away on my other blog, Manila Guerilla.

But this particular tag is kind of special. It will become Tag #100 on the MG site. I've read bloggers' posts when they reach an anniversary and it's only now that I can truly appreciate their mentioning it.

A milestone to be sure, when you begin blogging you often question why you should continue but after awhile the benefits begin to show. I like having a record of my work and a place to go to admire them. And it's easy to go back and revisit techniques that I want to try again.

But the very best part is the feedback and encouragement I've received and the friendships I have made.

I used to say, "I make a lot of stuff no one ever sees." Even though it was just to entertain myself, I began to question the validity without an audience. Since I enjoyed and was inspired by the work of so many others, I decided to jump in as well.

I can hardly believe how many of us are out there on the web sharing what we make. It makes me think that there are a lot more creatives in the world than anyone could have imagined.

So, with this post, I guess it's official--I am standing up to be counted and today it's one-hundred. In honor of the day, I want to celebrate by offering my readers an opportunity to receive one of my tags. Just visit Manila Guerilla and browse for the one you'd like then leave a comment here (make sure it includes an email address). I'll contact the winners a week from today (April 10th).

(comments closed...)

April 01, 2015

Life is Good


Spring in the desert means the state tree, called a Palo Verde is in full bloom and covered with a blanket of tiny yellow flowers. Yellow is practically the only color you'll see anywhere this time of year and it's pretty but also rather monotonous.

So I guess that's my excuse for creating this tag inspired by the pastel theme at Simon's Monday blog challenge this week.


Using watercolor paper cut in the shape of a tag, I painted the trunk then used a variety of small flower and leaf stamps.

Most were tinted with watercolor paint along with the background. Some I left white.

To create the pastel shades, I mixed white with my colors.

The bunny was hand-drawn on scrap paper and pasted to the tag. This way, if I didn't get the drawing right, I could just start over and not worry about erasing marks on the tag.

To frame the tag, I ran some Black Soot around the edges and bled the color using a wet brush.

Polka dots were made with a gel pen along the deckled edge and a Remant Rub was applied.

There are lots of bunnies here in the desert and they feast on the flowers that fall from the trees but I think life is real good for a bunny under a pastel flowered tree.


Happy Easter!