/* */ Beulah Bee: transparency
Showing posts with label transparency. Show all posts

December 05, 2018

12 Tags for Christmas 2018 - No. 6 & 7


I'm doing a look-back to Christmas tags of the past (see previous post) and this one was inspired by a crackling technique Tim demonstrated on one of his early tags.

I was probably listening to the Nutcracker Ballet when I thought of the design 😏 and, with a very limited amount of crafting supplies back then, I found a pattern for the ballerina and cut her out of card stock by hand.


The background stamp is the classic Tim Holtz Flourish and I may have hand-drawn the numerals. The snowflake sequins were dabbled with paint and glitter and a ribbon was used for the ballerina's tutu.

I am sharing this next tag for a remarkable feature that looks excellent in person but impossible to capture in a photo. Let me explain.


Santa's face is a clip-art photo that was printed onto a transparency (used with an overhead projector in the "old days" for business meetings). Then I placed the image in front of a sheet of metallic silver paper before I set it into the frame.

The effect is truly astonishing and the image takes on a vintage quality similar to that of mercury glass. It's hard to describe but I highly recommend trying this technique so you can see what I mean.


I'm linking this post to Simon's Monday Challenge Blog ("B is for Ballerina").

April 23, 2018

Marigold


I've made a greeting card to thank the hostess for a party my husband and I were invited to over the weekend.

It's nothing out of the ordinary but I used a few less common techniques that I thought would be fun to share.

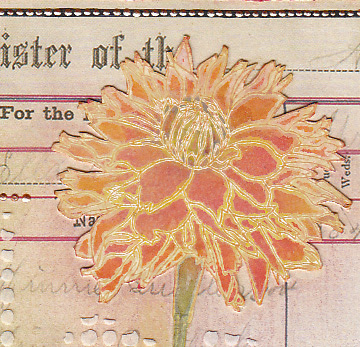
The main ingredients are the Flower Garden stamp set, a page from the Etcetera paper stash, some Tissue Tape, and a Dot Fade stencil (Tim Holtz).


I stamped then embossed the flower, tinted it with Distress inks then used super-cheap kid's construction paper as blotting paper and a hot craft iron to remove the embossing. Newsprint also works great for this technique. To learn more about this process, see this post.


I know there are a set of die-cuts available for this stamp set but mine was cut-out by hand using an Exacto knife and self-healing cutting mat.


Here's a tip you might find useful: Cut as close to the image as you can but don't worry about the irregular edges. Then go back and make the tiny cuts later and you'll find it a lot less intimidating.


And finally I'll share a tip I've blogged about in the past (see this post) that helps you decide where to crop your scrapbook paper when designing a layout.

This template is nothing more than a sheet of transparency that I made lines on with a permanent marker. I put masking tape around the edges to mask the background. I lay this template over my paper and move it around until I find a spot that I like and mark the corners with a pencil dot to guide my cutting lines.

This week's theme at Simon's Monday Challenge Blog is "Flower Power" so I'm linking up. I haven't made a card in ever so long and it was such a pleasure that I plan to make some more for this week's challenge (I have lots of flower stamps 😉).

December 15, 2015

12 Tags for Christmas - September


Perhaps one of the most challenging Tim Holtz tags this year was the one for September mainly because it featured an embossed transparency and I don't own the necessary equipment. While that fact is still true, my Christmas spin does feature a transparency that was laid (bowed) over the top of a paper background embellished with texture paste using the Idea-ology Scribbles stencil.

Click to Enlarge
I attached a stamped image that was cut from vellum to the back of the transparency along with some metallic star confetti then stitched around the edges to secure it to the tag. It looks pretty cool in person (though hard to photograph) and gives the appearance that the angel is hovering over clouds.

A Christmas Remant Rub was attached to the front of the transparency and a bit of Broken China Distress was used to tint the edges of the paste.

September 04, 2015

Remnants

rem·nant
/ˈremnənt/

noun

a small remaining quantity of something.

a piece of cloth or carpeting left when the greater part has been used or sold.

a surviving trace.


I only have remnants of brain matter left this month after working on my entry for Tim's September tag--it was a challenge!


To begin with, I'm alcohol-ink impaired so piles of glossy stamping paper later, I finally arrived at a background that might work.

I don't have transparent gloss texture paste so I used gloss gel medium with Tim's Scribbles stencil instead. I thought it would dry clear but I believe the thicker application prevented this. It's still somewhat transparent though and the pop of alcohol ink colors shine through but it's obviously not the same effect as Tim's.

Rather than highlight the texture with archival ink I used Vintage Photo Distress stain to darken the cracks and provide some contrast.

Click to Enlarge

There's no frosted paper in my studio so I took a laser printer transparency and sanded both sides to mimic this product. I guess it's close-enough but didn't curl as easy as his did.

Finishing touches included a Foliage charm, Remant Rubs (Words), ribbon scraps and Scribbles (3D fabric paint) dotted along the tag edges.

Tim's monthly tags always challenge me and this time, after allowing myself to fail (and learn), I thankfully pushed myself through.

I am grateful for the process and the end result!

April 18, 2014

Winged Things

A long, long time ago, when I was just a kid, me and the boy next door used to run around with butterfly nets, all summer long, because they were everywhere and it was fun to try and catch them. Thankfully, our aim was terrible and most escaped our grasp. But I rarely see butterflies anymore.

It's sad to think that today's children may be missing out on this adventure. Perhaps too much black pavement and too little green is the cause.


I made the butterflies using alcohol inks on a transparency, stamped with Archival ink, cut out and pasted to book paper then edged with Stickles.

The background is black gesso; the leaf layer made using paste medium with a hand-made stencil then tinted and distressed with acrylic paints.

The white marking was done with a very fine brush and white acrylic paint, a gelly roll made the text.

I've linked it to the Monday blog challenge at Simon Says Stamp where the theme is Winged Things.