/* */ Beulah Bee: book paper
Showing posts with label book paper. Show all posts

February 06, 2020

A Glimpse of Heaven

glimpse /ɡlim(p)s/  -  (noun)  a momentary or partial view

I'm drawn to vintage portraits with unusual or intense expressions. This image is a good example of what I mean and it's what prompted me to use it.

After some fussy-cutting and sanding, it was pasted to a tag covered with an old German bible page partially tinted with gesso, inks and colored pencils.

The flowers were cut from scrapbook papers and the text is a Clippings Sticker (Tim Holtz). I use these stickers a lot, their curation is very good and always seem to prompt a creative angle/story I might not have considered.


I stamped the symbol in the sky with grey archival ink and enhanced the values with a black fine-line pen.

I'm linking to the "Flower Frenzy" challenge on Simon's Monday blog.

As always, I hope this post finds you well and happy and I appreciate your visit.

Until next time, take care. 

December 25, 2019

12 Tags for Christmas 2019 - Peace Love Joy


Wishing all of you peace, love and joy this Christmas!

Tag 10 for Christmas 2019 is book paper covered with tissue, pasted with die-cut pieces and tinted/embellished with ink, paint and glitter.

Click to Enlarge

The black and red tinting was created using ink pens and a waterbrush. I draw the ink lines and before they dry, I use the brush to spread/blur the color.

The die-cut pieces (Tim Holtz Poinsettia) came from Thelma's Christmas card.


The best feature here is the area inside the poinsettia where I applied Rock Candy Distress Stickles. Remember this stuff? It's a product that's been discontinued and one I wish they'd bring back!

December 18, 2019

12 Tags for Christmas 2019 - Believe in the Magic


So, all it takes is a prompt from Simon's Monday challenge and I'm off! This week's theme is "Cityscape" (add some buildings) and that was the inspiration for tag number eight.

The building image (Carabelle Studio Dans la Rue) was stamped on old book paper, tinted with inks and colored pencils then embellished with dimensional dots painted and glittered to look like Christmas string lights.


The little miss was cut from a Found Relative (Tim Holtz) and the kitty looks just like Howie, my cat, who turned 18 this month. It's Christmas everyday for this little guy who I spoil beyond belief!

December 08, 2019

12 Tags for Christmas 2019 - Christmastide


We've had a really rainy weekend here in the desert which made for a good time to get cozy in the craft room and make another Christmas tag.

I was channeling a vintage vibe with this one and used a page from an old German bible along with some fussy-cut paper from Graphic 45.


It was embellished with glitter glue, Glossy Accents and machine stitching and I used my typewriter for the text. I needed something to fill-in the bottom area and used a Stamp Collector stamp (Tim Holtz).

There's time to link yet again to Simon's Monday challenge for this week's "Let's Sparkle" theme.

November 26, 2019

12 Tags for Christmas 2019 - Pine Grosbeak


The idea for this third Christmas tag for 2019 was a happy accident that I followed through on with a few deviations in between.  Let me explain.

I die-cut the holly (Tim Holtz Mixed Media Christmas) from a book page and placed it on top of some paper scraps. One of them was an enlarged half-tone image from a vintage book and I thought the various dots peaking through looked cool so I decided to use it.

The bird was cut from a vintage book. It was originally black and white and I added color with red ink and collaged over the branches. I've never seen this bird myself but they live in colder climates. Imagine coming across one foraging in the snow! I love birds :-)

I created an oval with dimensional paint drops (Scribbles) and painted over the outside section to create the vignette.

I distressed it with sanding, added the washi tape and a Remnant Rub and then made it an official Christmas tag by embellishing it with platinum Stickles.


I'm linking to Simon's "Tape It Up" Monday challenge.

Here's a link to Christmas tags from previous years if you'd like to see more (or use the link in the label section below).

October 09, 2019

Purple Martin


Autumn is Simon's Monday challenge this week and was the inspiration for this greeting card. I dug out an older (but favorite) paper stash by Tim Holtz called Wallflower and the bird (a Purple Martin), leaves and feathers were cut from it.

The background paper is this year's Halloween release from Tim called Abandoned. Run, don't walk to purchase (before it's all gone) if you like dark-colored, jewel-toned distress-looking paper.

I couldn't resist adding the book text. It accidentally showed up on my desk while working and it just seemed like karma to add it. I expect to use the card as a kind of "get well" greeting to provide words of encouragement.

The border was made with Copper Scribbles and Olive Branch Nuvo Crystal Drops.


To prevent warping, I pasted the various cut-out bits using tiny drops of a quick dry adhesive only where needed (on the floppy bits, etc.).

I also tinted the leaves ever so lightly with colored pencils and a bit of ink to alter their original neutral appearance.

September 24, 2019

Summer Mind


While yesterday was the first day of fall, my mind and my heart will stay in summer for many months to come.

Living in the desert means hibernating during the heat of June through September but when the temperature breaks in the fall, activity-wise it's more like the summer everyone else was having. Festivals begin, strolls through the neighborhood are possible again and sitting out on the porch--a long-lost luxury.

So yes, I'm in a "summer state of mind" and that was my inspiration for this tag.

I'll describe the layers:

  • Calligraphic scrapbook paper (Authentique Classique: Pretty) cut in the shape of a tag was tinted with Distress Oxides.
  • Botanical collage paper was pasted over the top and the flower petals and leaves were filled-in with gesso.
  • The bug is from the Stampers Anonymous Entomology set and was stamped with black archival ink. The wings were also filled-in with gesso using a tiny brush.
  • The gessoed areas were painted with inks. Besides helping with adhesion, the gesso makes the colors more vibrant.
  • The text was cut from an old book.
  • I think most tags need a border to frame it and machine stitching around the edges was used for that purpose here.
I'm linking up to Simon's Monday challenge--the theme this week is stitching and also to The Funkie Junkie Boutique whose challenge is to make a tag.

Look for me on TFJB later this week where I'll have a guest spot and a fun project to share. Thanks for stopping by!

August 25, 2019

ATC Writers


Today I'm sharing some "artist trading cards" and the inspiration came from this week's challenge at Simon Says Stamp. Making multiples might have been implied so there are nine of them.

Many times, I'll thumb through books I've collected that were saved from dumpsters to get ideas and use for collages. A page from a history book captured my eye.


I trimmed each picture to standard ATC size, pasted them on thick cardboard, encased them with clear medium, used gesso to bring out the details and tinted them with markers.


I stamped the backgrounds by masking the faces and the text came from the same book which offered up a summary of the author's style.


The feature that really represents my style is the use of dimensional dots along the border. If you trade cards like these and would like one just let me know--my email is in the sidebar.

August 16, 2019

Summer


I'm celebrating summer with this project, prompted by two blog challenges: Simon's Midsummer Blues and Frilly Funkie Junkie's Let's Do It Again. The blue part is self-explanatory and doing it again meant revisiting an old project and creating a remake.

You may know that I do love fussy-cutting and especially the flowers from the Tim Holtz Wallflower paper stash. So that, along with a Baseboard Doll and Lace Baseboard Frame, was what I used to assemble this project.

It was mounted inside the back of a wooden panel that I covered with paper. The doll's left arm was originally bent up high and was altered by slicing and dicing and piecing together some baseboard from another doll.


Here's the original project that inspired the "do-over." It is a Configurations Box I made for CHA 2015. Paper dolls hadn't been invented yet so I cut the girls from a Found Relative photo. It was the year the Wallflower paper stash came out and I assembled a garden for them to sit in.


So, it is still mid-summer here in the desert and we'll have at least two and a half more months of high temps. There hasn't been any monsoons that bring rain so the dry spell weather-wise coincides with my own personal artistic dry spell and lack of posts. I'm thankful for the prompts this week and it feels so good to be working again!

Update: So proud this post became a Top Pick on the TFJB blog--thank you!

May 12, 2019

The Way


During an evening walk a few weeks back, I found a rusty, gold painted piece of metal (shaped like a wing?) which someone had tucked into a street sign in my neighborhood.

It was happenstance that I glanced-up at just the right time with just the right light to see it's shiny reflection and to know it was there.


And so I used it for a small plaque made with various papers (vintage book, Tim Holtz collage and butterflies cut from Prima scrapbook paper). The flowers are from the new Idea-ology Botanical Layers and the girl is a Baseboard Doll.

I used a bit of crackle medium around the edges, drew some lines and added shading to create a faux border, and trimmed the plaque edges with gold paint. The text was an image transfer.

I began work on this Monday when I discovered the Simon Monday challenge was "Add Something Metallic." Since this metal piece had been laying around my studio for awhile (with no idea of how or what to use it for), this challenge was just the push I needed.

I didn't think I'd get it done in time to enter but sure enough, I did!

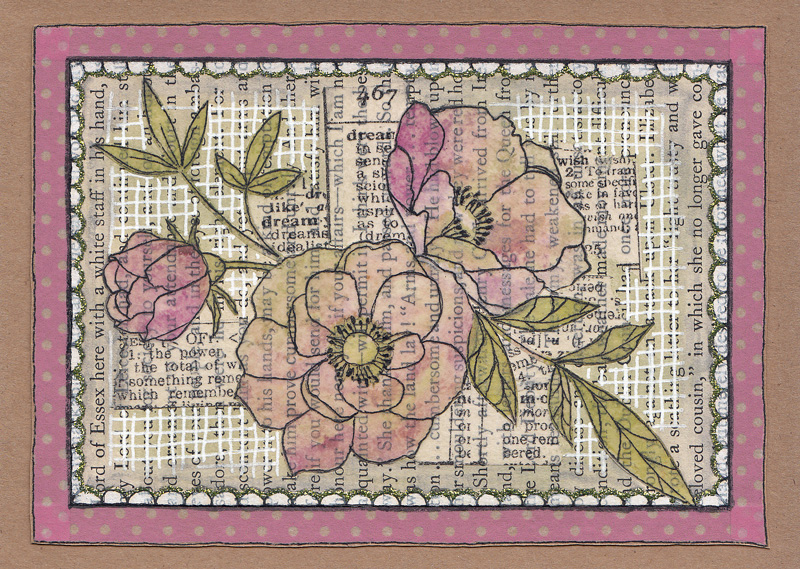
Happy Mother's Day

This is the card I made for my Mom this year. I am so grateful to have her still (she's a nonagenarian) and these days, our roles are reversed somewhat but more than a mom, she's my truest friend.

That's washi tape around the outside (pink polka dots), the scalloped border was hand-drawn and embellished with white paint and glitter glue.

The stamped pieces (Simon's Delicate Flower set) were cut from transparent paper that I tinted with inks and pasted onto book paper along with some more washi.


I used white and black gel pens to make lines in the background, on the borders and to further emphasize the line quality on the flowers.

I'm linking to the Monday challenge at Simon, the theme is "Add Something Metallic" and I think my glitter glue may qualify.

If you are a Mom, I hope your day is as special as you are!

November 28, 2018

12 Tags for Christmas 2018 - No. 4 & 5

I started making tags when I discovered Tim Holtz and his blog at the beginning of December 2009 and got caught up in his daily posts for the 12 Tags of Christmas.

I had little experience stamping, didn't know about Distress inks, and his tutorials were very detailed and very helpful. I was mesmerized and I was hooked.

Tim has kept links to these posts on the sidebar of his blog and I recommend them to paper crafting beginners as a learning tool--they are so much fun!

I've decided to share a few of the tags I made during this period (before Beulah Bee) because I'm a little short on time this year and won't be able to complete all 12 new ones.


This one shows my penchant for paper-cutting even back then but before I learned to tint the cut paper edges with a darker shade of ink (so they would blend in better). Scraps of pages from an old German bible were pasted on the background.


I used the same image on this tag (photocopied from a vintage greeting card that belonged to my Great Aunt Esther) and embellished it with a stamp embossed frame using antique gold powder.

The background is Tim Holtz kraft card stock and the tiny stars were recycled from a store-bought card and tinted with alcohol ink.

I could never have imagined back in 2009 that this year I'd be short on time making tags because of working on projects for Tim's Idea-ology booth at the January 2019 Creativation trade show!

What a journey (thanks, Tim)!

There are links in the sidebar to my Creativation/CHA projects or Christmas tags from past years.

September 04, 2018

The Beekeeper's Daughter


I've made a Vignette Tray assemblage/collage to share with you today. I chose the smaller tray size and used whiting (a wood stain) and some light sanding to alter the surface. This technique is known as "pickling."

I used this finish on a CHA 2017 project and here's the link if you'd like to see another example.


A Found Relative was cut-out and placed between a sandwich of two Baseboard Frames and vintage book paper of a blue sky was attached to the back.

The background consists of the stained wood of the tray along with vintage book paper text.

The large white script was made using a home-made stencil and white paint on Plain Collage Paper.

By using the collage paper, I have lots more control over where it's placed and after pasting down it becomes almost invisible.


The tiny bee on top is an image transfer on the backside of a vintage button (I filled in the holes with paste medium).

The sunburst is also a transfer and the image came from a Trader Joe's flyer.

The gentlemen were cut from French Industrial paper stash and there's also a vintage postage stamp.


The flowers were cut from the Wallflower paper stash and that's an Idea-ology key dabbed with white paint and dark ink to distress it.

The honeycomb was made with a Tim Holtz Mixed Media thinlet.

This piece was a long-time in the making and there were several versions before I finalized it.

Funny thing, though--I ended up returning to my original idea. I guess I needed to try out all the possibilities before I could fully embrace the design.

August 17, 2018

My Blue Shoes


Another digital photo just begging to be altered (thanks again, Vintage Everyday) and, in this case, in a most unconventional fashion. But I truly celebrate these type of creations because they conform to no one and are purely me.

And it's been awhile since I've made a tag and they're very therapeutic!

July 08, 2018

Beautiful


A recent purchase (Beautiful Flowers stamp set by Simon Says Stamp) has captured my interest more than most these days. The main flower grouping is really fun to experiment with and the detail is exceptional.

This time, I've stamped the image onto old book paper using brown ink. After it was fussy-cut, I mounted it on a background made with papers from the Wallflower Paper Stash and trimmed it with washi tape.

I filled in the embossed text with white Perfect Pearls and also dabbed it on the flower centers and some of the stamen.

June 24, 2018

Penny Farthing


A journal page to share with you today made for Simon's Monday challenge--this week's theme is "Transport It." It was a chance to embrace my passion for collage and to try out a new addition to my craft stash--Idea-ology Plain Collage Paper (Tim Holtz).


Over the years, I have amassed a sizeable collection of images taken from old picture books (no worries--they were destined for the trash) and it was a pleasure to find the material I used for the background.

I also used an image from the net that was fussy cut and pasted over the top. The foreground paper is from Tim's French Industrial paper stash. The text is a Tim Holtz Clippings Sticker.

The Plain Collage Paper was used to stamp the typewriter keys (Tim Holtz Documented) and also the postage stamp (Hampton Art 2010).


Here's a close-up view and you can see how transparent this collage paper can be. I find it superior to other tissue papers I have used in the past and know I will get a lot of use out of it. There are also printed versions with flowers, birds, and script.

In case you are wondering, a penny farthing is a high-wheeled bike and I suspect the driver of the motorcycle with sidecar may have been the photographer.

That's the Hammersmith Bridge, London in 1900. The city skyline is Florence, Italy, and the postage stamp and the stamped script (Inkadinkado) are French. Now that's traveling!

June 22, 2018

Lina Cavalieri

Click on photo for larger, lightbox view

Someday I should start saving all my tag experiments gone bad so that you can see how this format is really meant to be my chance to try new things and to learn from my mistakes.

Occasionally, I get it right (in my mind, anyway) and those are the tags I blog about. This one, in particular, is a good example of what I'm talking about.


I wanted to try a variation of this Tim Holtz technique using a new stamp called Beautiful Flowers by Simon Says Stamp. It's a process of embossing, painting in the areas with acrylics, and then wiping the lines clean.

The paint I used was initially transparent so variations in flower color are due to the background (an image transfer over a book page) showing through. I applied another layer of a more opaque color on the flowers near the top to achieve more uniformity.

It was easy to lift paint off the embossed areas even after the paint was dry and I'll definitely try this technique again.


I thought the play of text and page margin under the face would be interesting but it was too severe so I applied a strip of Tim Holtz Tissue Wrap along the edge to soften the contrast.

To balance out the bottom I added text with texture paste and a homemade stencil. The paste was white. I've learned from experience that it's almost impossible to tint the paste black before you apply it because the best you can expect is maybe a dark gray.


So I took a teeny-tiny paintbrush dipped in black ink and painted the texture paste after it had dried. I've never tried tinting the paste with ink instead of paint so maybe I'll give that a go on a future tag. I also wonder if there's a black texture medium that you can buy?

June 07, 2018

Bright & Beautiful


This week I learned that "all things bright and beautiful" is the first line of a poem/hymn written in 1848 by Mrs. Cecil Alexander whose published work was called Hymns for Little Children.

I've also spent the week converting wood stamps to cling mount and testing them (a project not for the faint of heart).

So to take a break and to link up with Simon's Monday challenge, I used various stamped "test" remnants along with an old book page, a vintage photo and some washi tape to create a collaged journal page.


I also had to try a technique I discovered this week where you stamp with Distress Oxide ink and then smear it just a bit with a blending tool. The page border was created this way and I have Stacy Hutchinson (via Tim Holtz) to thank for sharing this tip.


Stamp credits: Inkadinkado, Tim Holtz, Penny Black