/* */ Beulah Bee: greeting card
Showing posts with label greeting card. Show all posts

October 01, 2019

Happy Birthday Thelma


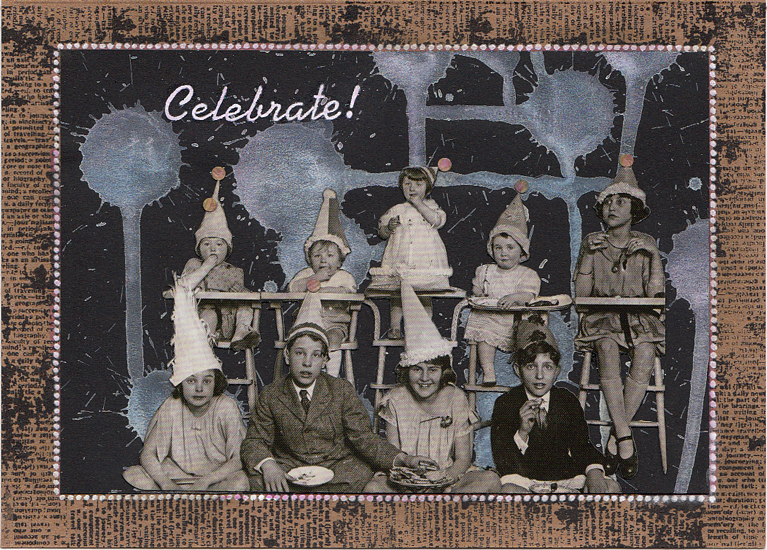
Thelma (my good friend who got me started stamping) has a BIG milestone birthday coming up and this is the card I made for her.

Nothing ground-breaking to talk about technique-wise but I would like to mention the flower garland because it was hand-drawn by me after a few simple lessons from the queen of coloring books--Johanna Basford. She has a new book coming out this month that teaches her drawing methods.

I gave the garland some color with my Polychromos then cut it out and pasted it onto scrapbook paper.


The cardstock I mounted it on couldn't be a standard card size so I found some really great instructions here for how to make an envelope in ONE MINUTE. Really!

Then I decorated the envelope using inspiration from Kristina Werner and realize I need more interesting postage stamps for the next time I do this. (No pics for privacy reasons.)

I wonder if the post office would mind if I used a real stamp along with some fake ones like these? I'll have to try it and then let you know.

May 12, 2019

Happy Mother's Day

This is the card I made for my Mom this year. I am so grateful to have her still (she's a nonagenarian) and these days, our roles are reversed somewhat but more than a mom, she's my truest friend.

That's washi tape around the outside (pink polka dots), the scalloped border was hand-drawn and embellished with white paint and glitter glue.

The stamped pieces (Simon's Delicate Flower set) were cut from transparent paper that I tinted with inks and pasted onto book paper along with some more washi.


I used white and black gel pens to make lines in the background, on the borders and to further emphasize the line quality on the flowers.

I'm linking to the Monday challenge at Simon, the theme is "Add Something Metallic" and I think my glitter glue may qualify.

If you are a Mom, I hope your day is as special as you are!

May 04, 2019

Beautiful to Me


Let's just say you don't see these greeting card techniques everyday so I thought they might be worthy of a share. I made this card for my stamping sister, Thelma, using the new bottle of glitter that she had gifted me.

I stamped my images (Simon's new Delicate Flowers set) on purple cardstock, outlined the edges with Nuvo Glitter Drops, used bleach with a paint brush to lighten the colored paper, tinted the space with colored pencils (orange and green), and finishing up with a big ol' fussy-cut.


I mounted my cut-out on some Prima cardstock (Ephipany), used black Scribbles to bring out the stamens, and edged the card with thin dark grey paper and more Glitter Drops.

I've used Nuvo Crystal Drops before but this was a first for the glitter drops and I must say they are very useful for a number of reasons. First, the are very easy to apply--the fine tip and soft-sided bottle allow for good precision. Second, this stuff is tough! Even after using the bleach, rubbing in the tints, and cutting right next to it, the glitter never came off the paper. It reminds me of Glossy Accents with glitter in it.

April 24, 2019

Sending Hugs


I got side-tracked trying out a new stamp set from Simon called Delicate Flowers and ended up with a card I hadn't really planned on.

I'd been experimenting with coating thin papers with various mediums to use for collage. I had some rice paper, coated one side with fluid medium, let it dry and then decided to stamp it with my new set to make some masks.

After cutting the pieces out, I played around with tinting them and liked the result so I decided to use one of the flowers plus leaves on a greeting card. If you look closely, you'll see that the flower is transparent.


The background paper with the scrolls, bird, etc. is old stock from Prima called Epiphany.


I messed-up stamping the sentiment so I cut out that section, replaced it with a smaller square and re-stamped my text. A good save and one I'll remember if and when I mess-up again!


Yes, it looks handmade and it's a bit unconventional, but I'm dedicating it to all the encouraging commenters from my last post, embracing my greeting card style and learning a few tricks along the way.

April 20, 2019

Hello Friend

This card/stamping took so many tries that I almost gave up.

My artistic point-of-view takes a turn when I set about making a card. I try to be very precise so it looks "store-bought" but if it were a tag or mixed media project, I'd embrace the imperfection.

Eventually, I come around and remember that the hand-made qualities are what makes card-making superior to those that are mass-produced and machine-made. I will be bookmarking this post so I can remind myself of this point for the next time!

In this close-up, I'll point out that I stamped the image (Tim Holtz Flower Jar) on scrapbook paper using archival ink and tinted it with gel pens. For the water in the jar and the table-top, I spread the ink using a water brush (same as with the tops of the purple flowers).

The submerged stems were hand-drawn and smudged and it was tricky to get it to look right. I should have practiced on some scrap before attempting it on my card and I wouldn't have had so many do-overs (duh!).

The oval frame was machine-stitched but needed something else so I used a white Gelly Roll pen to highlight the edges.

Some of my readers know that I often use dimensional products like Scribbles or Liquid Pearls to make dots. I recently discovered a new product called Nuvo Crystal Drops (which I really like) and went kind of crazy with them here.

Mounting all of this on kraft cardstock helped convey the old-fashioned feel of the card.

I'm linking up to Simon, this week's Monday challenge is Beautiful Blooms and then I'm tossing this card in the post. 

BTW, the sentiment is from a new stamp set by Simon called Delicate Flowers. I splurged and bought the May card kit and am excited about using it.  Stay tuned!

February 13, 2019

Happy Valentine's Day


My good friend Thelma (I'm Louise) introduced me to card-making and it's understood that the cards we exchange between ourselves can be an outside-the-box/anything goes kind of flavor. Because there are no rules it makes our tradition that much more fun.

This is the card she will receive tomorrow, made from an assortment of papers (mostly Authentique) including one called "Stitches Two" which is the band running through the center.

The card also includes a hand-colored printable (background heart border) that I distressed and embellished with dots of Scribbles (3D fabric paint). I used an assortment of gel pens for the coloring.


I have a very limited stash of sentiment stamps so this one was taken from an example found on the net. My technique is to print the example, rub a thick coating of graphite (pencil lead) on the back, tape it down with washi and trace over the top of it. This transfers most of the outline of the lettering and then I go back over it with a fine-tipped marker. The heart trio was stamped.

July 28, 2018

Christmas in July


Simon's Monday challenge was prompted by a special blog hop and a chance to win some crafting goodies, but Christmas in July--really?


While it was hard to "get in the spirit" when we've had record-breaking high temps this week, I accepted the challenge and here's my entry.


My card may be a little unconventional so I thought you'd appreciate a peek at the main ingredients before I applied a wash of gesso and then Distress Oxide (Peeled Paint) to create the background.


It would be difficult to pull this off without using a strong backing so I pasted the collage onto some thin packaging material which would be cut to size near the end.


Some Liquid Pearls (Ranger) were dotted around the oval, the backing was trimmed and then I pasted brown mulberry paper (because it's thin) on the back to frame it. Before mounting on folded cardstock, I stitched around the border.

The poinsettas were cut out of Graphic 45 Winter Wonderland, the bird is from Wallflower and the calendar page is from Tidings (Tim Holtz Paper Stash).

I used a glue stick for everything except the poinsetta (attached using spray adhesive) and the final mounting (double-sided cellophane tape).

April 26, 2018

Polyommatus Theo


This moth was clipped from some vintage Tim Holtz kraft paper and it was labeled as a "Polyommatus Theo." Now you know.


It became a decoration for this greeting card made from other Tim papers as well as an old book page. I seldom add sentiments so I can use the card for any occasion.


The flowers (Stampers Anonymous Flower Garden set) had another life before they became a part of this card. When a tag I was working on turned south, I cut them off the tag and reused them.


I used a transparent white paint to fill-in the flowers and the Distress inks underneath bled through. This explains the coloring you see in the final piece.

The text stamp is Stamper's Anonymous Ledger Script and the dots are Perfect Pearls and there's also a bit of machine stitching (something you don't see on a store-bought card).

I'm linking to Simon's Monday Challenge blog for this week's theme which is Flower Power.

April 23, 2018

Marigold


I've made a greeting card to thank the hostess for a party my husband and I were invited to over the weekend.

It's nothing out of the ordinary but I used a few less common techniques that I thought would be fun to share.

The main ingredients are the Flower Garden stamp set, a page from the Etcetera paper stash, some Tissue Tape, and a Dot Fade stencil (Tim Holtz).


I stamped then embossed the flower, tinted it with Distress inks then used super-cheap kid's construction paper as blotting paper and a hot craft iron to remove the embossing. Newsprint also works great for this technique. To learn more about this process, see this post.


I know there are a set of die-cuts available for this stamp set but mine was cut-out by hand using an Exacto knife and self-healing cutting mat.


Here's a tip you might find useful: Cut as close to the image as you can but don't worry about the irregular edges. Then go back and make the tiny cuts later and you'll find it a lot less intimidating.


And finally I'll share a tip I've blogged about in the past (see this post) that helps you decide where to crop your scrapbook paper when designing a layout.

This template is nothing more than a sheet of transparency that I made lines on with a permanent marker. I put masking tape around the edges to mask the background. I lay this template over my paper and move it around until I find a spot that I like and mark the corners with a pencil dot to guide my cutting lines.

This week's theme at Simon's Monday Challenge Blog is "Flower Power" so I'm linking up. I haven't made a card in ever so long and it was such a pleasure that I plan to make some more for this week's challenge (I have lots of flower stamps 😉).

November 10, 2015

Choose Joy


I made this card for a teacher who inspired me with a quote recently read in class (just the right words for the way I was feeling that day) and I'm linking it to Jennifer McGuire's Share Handmade Kindness challenge post.

Made with Wallflower vellum, stamped fabric using a hand-carved butterfly and a background stamp by Inkadinkado, it was embellished with machine stitching and Ranger's Liquid Pearls. The text is a Remnant Rub mounted onto a painted Grungeboard scrap.

On the inside, I typed the following quote:

"Choose joy. Then cherish and savor it.

Joy is not a fleeting emotion based on outward circumstances, a transitory feeling of the moment, a reaction to the scenery around you. It comes from within your heart like the waterfall that rushes out the side of a mountain. Joy is a runoff from the wellspring within you. And sometimes it is a delightful, surprising contrast to the scenery around you.

Embrace joy. Relish it. Even if those around you don't have it right now, you can feel your joy. You don't have to be disrespectful of their feelings, nor do you have to let their lack of joy diminish yours.

You have done your work. You have chosen to open your heart. Now you have your reward.

Cherish joy. It's your treasure. You've found it. You've earned it. It's yours."

-Melody Beattie


I'm also linking this to Simon's Monday blog challenge this week. The theme is Create Something Beginning with the Letter N (I used a needle) and it turns out that stitching is an excellent way to anchor vellum to cardstock. My thanks to the inspiration provided by Andrea Ockey Parr which gave me the idea to use fabric on my card.

September 24, 2015

Sparkle

Click to Enlarge
The most difficult stamp I have ever worked with (and also the most expensive) is this image by Lynne Perella for Paper Artsy. I don't know why it's not available in the US so I had to order it from the UK and the shipping added a greal deal to the cost.

It has a tremendous amount of detail and is not deeply etched so it's a bit of a struggle to get an impression that's satisfactory.

This time I used a really bizarre inking method that worked rather well. Surprise, surprise.

I applied thick watercolor using a brush and let it dry then stamped over that layer with black dye ink. Then I lightly spritzed it with water and stamped onto my paper surface.


The paper border was made with one of the most useful stamps I own and if I had to pick a favorite from my collection this would be it because it's so versatile. It's from Tim Holtz and is part of the Visual Artistry Lost and Found stamp set.


The text is Idea-ology chit-chat and the dots are Ranger Liquid Pearls.

I made this card for my bestie Thelma who's got a milestone birthday on the horizon and I'm linking to Simon's Monday blog challenge where this week's theme is use a stamp.

I must give a special shout-out to all the Design Team members who really rocked their creations this week. It was very inspiring!

June 26, 2015

Celebrate!


Finally, a reason to celebrate! What's the occasion? No, it's not a birthday. Instead, it's the fun of using a favorite image from the Occasions Found Relatives photo pack to make this card.

It all started with Simon's Monday blog challenge where this week's theme is stamp and mist.  I'm not a big fan of the spray inks mainly because my workspace just won't accommodate the messiness so I used an eye dropper and made splatters on a black background with diluted white paint instead.

Click to Enlarge
It kind of looked like a party so I grabbed this very appropriate photo. It took a while to fussy-cut but the job was made easier by peeling off the backing so it wasn't as thick. I stamped the border and sentiment and added some dots.

Check out this close-up--the kid was caught making a grab for cake (his expression doesn't fool me).

May 28, 2015

Thanks


For Simon's Monday blog challenge, where this week's theme is thanks, I thought I'd share a design I've used on many occasions. It's quick to put together (especially when I need more than one) and eliminates any excuse for putting off a thank-you that's due.

I stamped (and embossed) the PaperArtsy bottles (tinted with Distress inks), an assortment of tiny flowers (tinted with colored pencils) and the sentiment. The stems and the border were made with a fine line permanent marker. That's it--done! No cutting or pasting either, since I stamped directly onto the card front.

I really like the details in the bottle stamp and it's fun to try and mimic the old glass effect. I use this stamp quite often. Did I mention I collect old bottles? Perhaps that has something to do with it. ☺

February 12, 2015

Dear Thelma


My dear friend Thelma (I'm Louise), introduced me to rubber stamping a few years ago and, without sounding overly dramatic, my life (and my storage requirements) have never been the same since.

This is the card she will receive from me this year which began as an image transfer on watercolor paper, then resist embossing, layers of distress ink and lacey ribbons added to embellish.

The shiny border dots are Liquid Pearls, a 3-D paint by Ranger that's a bit tricky to apply but creates a great effect when you want some old-fashioned glam.

I'm linking to the Monday blog challenge at SSS where this week's theme is Red and Pink.

December 21, 2014

Snow

Click to Enlarge

Far from a traditional Christmas card, this one was made for my good friend Thelma who introduced me to card making. Over the years, we have traded creations and pushed the envelope in an almost "can you top this" fashion. So it will be no surprise when she receives this year's card from me.

The group photo came from Tim's Merriment paper stash and the background is a chalkboard line from The Paper Studio. I embellished it with strips of book paper, a white Gelly Roll pen, black and white Stickles, and silver Liquid Pearls.

It's hard to see but the children in front are sitting on a toboggan, a large sled that seats many. I grew up in Colorado and my family had one. I remember the great fun of cold winter days spent speeding down hills and the long hard walk to climb back up again. I feel very fortunate to have such good childhood memories and am grateful for my parents who made them possible.

I'm linking to this week's Monday blog challenge at Simon Says Stamp which is "anything goes."

February 12, 2014

Birds of a Feather

click to enlarge
Here is the valentine I made this year for Thelma (my good friend who introduced me to card making). I always push the envelope when making something for Thelma as she's somewhat traditional but has begun to let her creativity run wild after a bit of inspiration.

I stamped directly onto kraft paper card stock using a rainbow ink pad and the French script stamp from Dark Room Door. I tore strips of washi tape to make a border then blotted on Picket Fence Distress stain. The hearts were cut from deli-wrap that was stamped and trimmed with acrylic paint. The birds were made by stamping (Tim Holtz, Birds on a Wire) on the back side of some glitter paper then cutting out and pasting the front side up. I edged the border with dots and lines using a fine-tip marker.

The inscription on the inside will read:

Birds of a feather stick together!
Happy Valentine's Day

It just so happens that the Wednesday blog challenge at Simon Says Stamp is "Get Krafty" so I'm linking it there and then it's off to the mailbox so Thelma will get it by Friday.

February 05, 2014

Love Notes


The Simon Says Stamp Monday blog challenge is "Love Notes" and that was my inspiration for this greeting card design. Fashioned from various collage papers and rubber stamps (Paper Artsy), I used sewing machine stitching and painted dots to add interest along with a branch cut from scrapbook paper.

December 19, 2013

For Thelma at Christmas

greeting card, santa

My good friend Jan aka Thelma (I'm Louise), acquainted me with rubber-stamping a few years' ago and back then, I never would have imagined that, someday, I would have an entire drawer full of stamps myself.

We always exchange a card at holidays and this is what I'm sending her this year. The stamp is from the Tim Holtz Components Collection and the paper is from the Merriment Paper Stash by Idea-ology.

greeting card, santa

I've entered this card in both drawings over at Simon Says Stamp (Monday challenge is use a stamp, Wednesday challenge is "bling it on").

If you haven't seen a side-by-side comparison of Distress versus regular Stickles, I've used both on this card. I used colored pencils on Santa and Tea Dye Distress Stain to age the appearance.

Now I'd better get it in the mail, there's only five more days till Christmas!

December 07, 2013

A Wish (and a Prayer) for Callie

My sister in-law, Callie, has a lump in her breast. Her mom died at the same age she is now from breast cancer. Callie never had a mammogram, I can't understand why. Her husband felt the lump and now she's being treated for it.

My mom had breast cancer this year but she is 83 years old and the doctors treat it very differently than they would if it was found in a younger person.

I've learned more about breast cancer this year than I ever expected to and must remind anyone who reads this about the importance of regular mammograms. It's so much easier to cure when it's caught early.

moth, greeting card

I made this card for Callie by staining black and white scrapbook paper with Distress Inks, added a hand-cut frame made from black card stock, used 7 Gypsies Conservatory paper inside the frame and cut the moth from a page of Idea-ology Kraft Resist stained with Distress Inks and a touch of Perfect Pearls.

I like this card a lot and I know I do my best work when strong emotions are involved but wish the circumstances were different for this one.