/* */ Beulah Bee: stitching
Showing posts with label stitching. Show all posts

May 02, 2019

Duplicate

Craft nerd (and big fan of tags) that I am, when I heard the Monday challenge at Simon this week was "Tag It" I jumped right in. I grabbed a scrap of Tim Holtz paper (Memoranda) and a couple of his stamps and boom--a tag was born!


After stamping, I machine stitched, drew lines, tinted with markers and colored pencils, added some tissue tape, ephemera (the cigar ring and buttons), and even a touch of Glossy Accents.

No plan, no rules, just spontaneous play and when my head is in this kind of zone I am happiest. Thank-you, Simon!

April 20, 2019

Hello Friend

This card/stamping took so many tries that I almost gave up.

My artistic point-of-view takes a turn when I set about making a card. I try to be very precise so it looks "store-bought" but if it were a tag or mixed media project, I'd embrace the imperfection.

Eventually, I come around and remember that the hand-made qualities are what makes card-making superior to those that are mass-produced and machine-made. I will be bookmarking this post so I can remind myself of this point for the next time!

In this close-up, I'll point out that I stamped the image (Tim Holtz Flower Jar) on scrapbook paper using archival ink and tinted it with gel pens. For the water in the jar and the table-top, I spread the ink using a water brush (same as with the tops of the purple flowers).

The submerged stems were hand-drawn and smudged and it was tricky to get it to look right. I should have practiced on some scrap before attempting it on my card and I wouldn't have had so many do-overs (duh!).

The oval frame was machine-stitched but needed something else so I used a white Gelly Roll pen to highlight the edges.

Some of my readers know that I often use dimensional products like Scribbles or Liquid Pearls to make dots. I recently discovered a new product called Nuvo Crystal Drops (which I really like) and went kind of crazy with them here.

Mounting all of this on kraft cardstock helped convey the old-fashioned feel of the card.

I'm linking up to Simon, this week's Monday challenge is Beautiful Blooms and then I'm tossing this card in the post. 

BTW, the sentiment is from a new stamp set by Simon called Delicate Flowers. I splurged and bought the May card kit and am excited about using it.  Stay tuned!

March 30, 2019

Automatic

Lyrics from a song by Miranda Lambert is the text typed on this tag that features wildflowers in canning jars.


It's my first time working with a stamp set (Tim Holtz Flower Jar) that has matching dies and I cut the images out of tissue paper so I could layer the arrangement without adding bulk.

The background is a page from the Tim Holtz Etcetera paper stash.

I used sepia archival ink on the flowers but in hindsight, I probably should have used black.

I tinted the flowers with dilute acrylic paint so it would be waterproof during the pasting process.

I like the scale of this set (it's tiny) but that does make it more tedious to use. And there are also some design challenges like a solution for the flower stems that appear inside the jar.

I penciled-in the lower stems but they would have looked better with more defined edges (less blurry). I'll work on my technique for the next time!

I think it would be very hard to arrange the flowers just by stamping so it's good that the coordinating die-cut set is available.

But I plan to give it a try--a clean white background with a delicate stamping would be nice on a greeting card. (I'll keep you posted.)

I'm linking to Simon's Monday challenge, this week's theme is Play with Paint.

February 13, 2019

Happy Valentine's Day


My good friend Thelma (I'm Louise) introduced me to card-making and it's understood that the cards we exchange between ourselves can be an outside-the-box/anything goes kind of flavor. Because there are no rules it makes our tradition that much more fun.

This is the card she will receive tomorrow, made from an assortment of papers (mostly Authentique) including one called "Stitches Two" which is the band running through the center.

The card also includes a hand-colored printable (background heart border) that I distressed and embellished with dots of Scribbles (3D fabric paint). I used an assortment of gel pens for the coloring.


I have a very limited stash of sentiment stamps so this one was taken from an example found on the net. My technique is to print the example, rub a thick coating of graphite (pencil lead) on the back, tape it down with washi and trace over the top of it. This transfers most of the outline of the lettering and then I go back over it with a fine-tipped marker. The heart trio was stamped.

July 28, 2018

Christmas in July


Simon's Monday challenge was prompted by a special blog hop and a chance to win some crafting goodies, but Christmas in July--really?


While it was hard to "get in the spirit" when we've had record-breaking high temps this week, I accepted the challenge and here's my entry.


My card may be a little unconventional so I thought you'd appreciate a peek at the main ingredients before I applied a wash of gesso and then Distress Oxide (Peeled Paint) to create the background.


It would be difficult to pull this off without using a strong backing so I pasted the collage onto some thin packaging material which would be cut to size near the end.


Some Liquid Pearls (Ranger) were dotted around the oval, the backing was trimmed and then I pasted brown mulberry paper (because it's thin) on the back to frame it. Before mounting on folded cardstock, I stitched around the border.

The poinsettas were cut out of Graphic 45 Winter Wonderland, the bird is from Wallflower and the calendar page is from Tidings (Tim Holtz Paper Stash).

I used a glue stick for everything except the poinsetta (attached using spray adhesive) and the final mounting (double-sided cellophane tape).

May 27, 2018

Thanks ...


After working on this card, I now have new respect for the challenges that this art form presents and for the artisans who make it look so effortless.

Mixed-media? No problem--you can just paint over a part you don't like. Card making requires more planning and if you make a mistake sometimes you just have to start over.

But practice makes perfect, right? So I plan to do just that and purchased the June Card Kit from Simon Says Stamp. It features a lovely stamp set called Beautiful Flowers and I have used it for this card.

The kit came with three dots (red, yellow, blue) of an artist-grade watercolor paint from Daniel Smith and this was the only paint I used to tint this stamping.

Using the science of complimentary colors becomes critical in this scenario because you must tone down the primary pigments for the colors to look more natural.


The border was made with kraft paper using the new Tim Holtz 3D embossing folder called Botanical (also included in the kit) and machine-stitching provided some accent.

Otherwise, it's a bit of a plain jane but I didn't think it needed anything else since the flower image is such a show stopper. Thanks to this new stamp set, I now have some sentiment stamps that I was sorely lacking which will help me with my new quest in card-making.

April 26, 2018

Polyommatus Theo


This moth was clipped from some vintage Tim Holtz kraft paper and it was labeled as a "Polyommatus Theo." Now you know.


It became a decoration for this greeting card made from other Tim papers as well as an old book page. I seldom add sentiments so I can use the card for any occasion.


The flowers (Stampers Anonymous Flower Garden set) had another life before they became a part of this card. When a tag I was working on turned south, I cut them off the tag and reused them.


I used a transparent white paint to fill-in the flowers and the Distress inks underneath bled through. This explains the coloring you see in the final piece.

The text stamp is Stamper's Anonymous Ledger Script and the dots are Perfect Pearls and there's also a bit of machine stitching (something you don't see on a store-bought card).

I'm linking to Simon's Monday Challenge blog for this week's theme which is Flower Power.

March 11, 2018

Cool in the Shade

My favorite teachers? The passing of time, experience, practice, experimentation, mistakes. Case in point this tag (made for Simon's Monday theme "Whatever the Weather"):


  1. Learning how to use Photoshop's recompose tool to crop this photo without losing the photograph's border frame.
  2. Experimenting with Tim Holtz Distress Oxide Ink technique on glossy paper with mixed results (too much water, not enough ink?).
  3. Applying crackle medium to paper, the product I use has to be applied really thick--it was too thin this time to show up.
  4. The benefit of delaminating some Idea-ology paper stash to reduce bulk when collaging (text piece is full thickness, report card area was made thinner). Each time I try this, I get better at it. The trick is to gently rub off the back with a little water after peeling away as much as you can.
  5. The flowers (Idea-ology ephemera) were also delaminated because they are easier to refine with cutting when the paper's not so thick.
  6. Proved again that for me, the best way to tint a photo is still using a dab of ink from a gel pen with a little water (the turquoise in the wallpaper behind the teacher, for example).
  7. Appreciating that without adding a little whimsy to the piece an observer might think it too serious and wonder about my mental state. (Perhaps you should anyway.)
The weather connection is in the Idea-ology text from the Memorandum paper stash. I do believe this teacher is cool in her shades. Also note the Red Precipitate Ointment which is a nice touch--don't you think?


By the way, my favorite human teacher was Mrs. Jennings who had the patience to work with me in the 5th grade when I refused to learn multiplication tables and provided comfort from bullies.

December 06, 2017

12 Tags for Christmas 2017 - Merry & Bright


I've reached the half-way mark, here's Tag 6 of 12 for Christmas 2017, and I am having a blast! This one was easy as pie using a Christmas Collage stamp tinted with Distress Ink and mounted on a page from the Tidings paper stash.

I machine-stitched around the edges with two colors of thread, went crazy with glitter glue (Stickles), added the holly and berries (hand-cut from some Tim Holtz Ephemera) and then a strip of Lace Trimmings.

October 07, 2017

One of Many


A walk on the dark side (Simon's Monday challenge for this week) prompted a tag made from Tim Holtz ephemera and a Clippings Sticker.


Why one of many? Well, let's see:

  1. One of many tags that I make.
  2. One of many from the popular technique of attaching butterfly wings to something.
  3. One of many bones in our bodies.
  4. One of many letters in the alphabet.
  5. One of many flowers in our garden.
  6. One of many elements in the periodic tables.
  7. One of many who perished this week by the hands of a mad man.
  8. One of many prayers said for an end to this insanity.

July 03, 2017

Fortune Teller


I'm so delighted to be a Guest Designer this month at the Simon Says Stamp Monday Challenge Blog and if this is your first visit here--hello and welcome!


Our challenge this week is to use red, white and/or blue and features products by Sizzix. I used the Tim Holtz Texture Fade called Roses to create the background for this tag.


After embossing an old book page, I swiped Red Brick Distress Ink on the raised parts. It looked pretty good but I wanted to experiment.

So I spritzed the page with a healthy dose of water (which moved the color into the background) and let it dry. It was still okay but when I turned the page over I got really excited about how the backside looked and that became the background I used for this tag.

To add a little variety of color, I lightly swiped white paint over some of the raised parts.


Next came the oval, cut from a vintage postcard. It needed a border so I hand-stitched around the edge using dark gray embroidery floss then repeated the stitching along the tag edges. I smudged a tiny bit of charcoal pencil around the oval to give it some depth.


The little miss is an Idea-ology Paper Doll dressed up with Lace Trimmings and more stitching (this time using thick white thread). To get the lace to hold it's shape after gathering, I coated it with watered down white glue and let it dry before using Glossy Accents to attach it to the bottom of her skirt.

The original vest was dark gray but I wanted to make it red so I lightly scratched into the surface with an X-Acto Knife which gave me a lighter surface to tint.


The photo above shows how I pre-punched holes with a pin tool to make hand-stitching the scarf a little easier. I didn't have blue thread so I used white and just tinted it to match the skirt.


The scarf inspired me to use a Clippings Stickers text from Idea-ology.
A black star (traced from an image) was placed near her feet.
Tiny stitches were sewn on her vest.
I made a shadow beneath her with charcoal pencil.
Black Soot and Walnut Stain Distress inks were rubbed here and there.

----------------------------------------------------------------------------------

I really hope you'll join us for this week's challenge because I want to see what inspires you!

And when you upload your creation to the Simon Says Stamp Monday Challenge Blog you'll have a chance to win a $50 voucher at the Simon Says Stamp store!


Here's a list of the products I used for this challenge
which can be ordered from Simon:


May 04, 2017

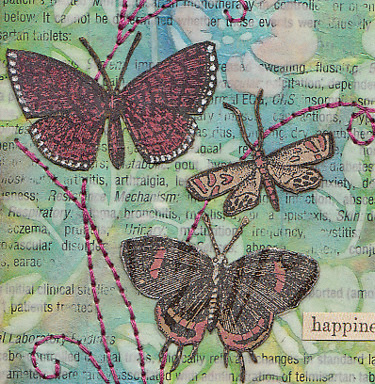
Happiness


Ah, the merry, merry month of May...

The high temp today in my neck of the woods was 104°F.  A bit warmer than normal, to be sure, but pleasant just the same as May means the crowds are thinning out and the pace is beginning to slow--a precursor of the quiet peace that comes with the heat.

My tag was made to celebrate the great outdoors which is the theme this week for the Monday challenge blog at Simon Says Stamp.

It was an opportunity to use a new Tim Holtz stencil called Floral which I fell in love with after seeing Paula Cheney's Instagram post and was the inspiration for the colors I used.

Rather than use a monoprint technique as she did, I opted to use texture medium over a text background then sanded it down before tinting with Distress inks. The medium helped to resist the ink and retain the stencil pattern.


The moths were cut from a discontinued Tim Holtz paper stash called Kraft Resist which I tinted with Distress markers and a white gel pen. The text is from the new Idea-ology Clippings stickers.

I didn't use machine stitching for the accents because the texture medium just didn't want to feed through smoothly. So, I opted for my backup method which is a good technique for those who don't have a machine.


I use a piece of cardboard placed under the tag and punch holes for my hand stitching with a "pin tool." It's a leftover from my days making pottery but I think it would be easy enough to find a substitute to punch the tiny holes needed. Pre-punching makes the stitching so much easier and it's a curiously pleasant task!

It's also a great method when accuracy is a must as I have more control punching than I do keeping my foot steady on the sewing machine pedal. A simple backstitch is all it takes to complete it.

April 23, 2017

Delicious Food


"Candy is delicious food." That's what it says right on the wrapper and so it must be true. And this candy bar is also "rich in dextrose, the sugar your body uses directly for energy." Who doesn't need some of that!?

This old wrapper (circa 1940) was pasted to a tag. I added some stitching, ink and Remnant Rubs along with an image stamped on paper then cut out (Tim Holtz Sideshow).

My dad found it (probably under an old house--he was a plumber by trade) and kept it tucked away in an envelope which I came across recently. He liked old stuff too (especially bottles) and must have felt this wrapper was worth keeping.

It was quite crumbly but I managed to reassemble it and maybe it will last another 70 years.

December 31, 2016

12 Tags for Christmas - December


I didn't mean to wait so long to complete my final tag of this series and link it to Tim's December post but it's been a busy month.

Each day I would pass by the bulletin board in my bedroom/studio and see the blank spot meant for this month's tag. I considered skipping it but that just wouldn't sit right with me--my track record for completing the monthly tags will not be broken!

So on the last day of the month, last day of the year and at the very last minute, here's number 12.


Happy New Year!