/* */ Beulah Bee: hand-cut
Showing posts with label hand-cut. Show all posts

May 12, 2019

Happy Mother's Day

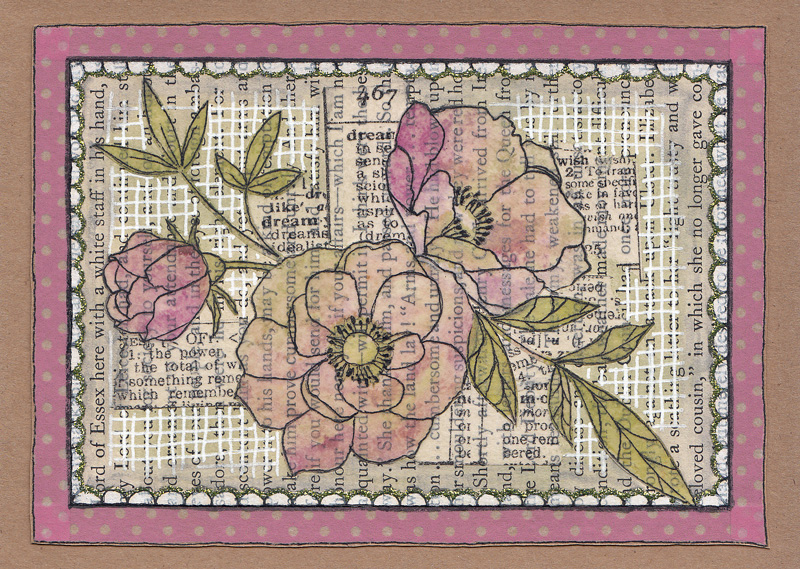
This is the card I made for my Mom this year. I am so grateful to have her still (she's a nonagenarian) and these days, our roles are reversed somewhat but more than a mom, she's my truest friend.

That's washi tape around the outside (pink polka dots), the scalloped border was hand-drawn and embellished with white paint and glitter glue.

The stamped pieces (Simon's Delicate Flower set) were cut from transparent paper that I tinted with inks and pasted onto book paper along with some more washi.


I used white and black gel pens to make lines in the background, on the borders and to further emphasize the line quality on the flowers.

I'm linking to the Monday challenge at Simon, the theme is "Add Something Metallic" and I think my glitter glue may qualify.

If you are a Mom, I hope your day is as special as you are!

May 04, 2019

Beautiful to Me


Let's just say you don't see these greeting card techniques everyday so I thought they might be worthy of a share. I made this card for my stamping sister, Thelma, using the new bottle of glitter that she had gifted me.

I stamped my images (Simon's new Delicate Flowers set) on purple cardstock, outlined the edges with Nuvo Glitter Drops, used bleach with a paint brush to lighten the colored paper, tinted the space with colored pencils (orange and green), and finishing up with a big ol' fussy-cut.


I mounted my cut-out on some Prima cardstock (Ephipany), used black Scribbles to bring out the stamens, and edged the card with thin dark grey paper and more Glitter Drops.

I've used Nuvo Crystal Drops before but this was a first for the glitter drops and I must say they are very useful for a number of reasons. First, the are very easy to apply--the fine tip and soft-sided bottle allow for good precision. Second, this stuff is tough! Even after using the bleach, rubbing in the tints, and cutting right next to it, the glitter never came off the paper. It reminds me of Glossy Accents with glitter in it.

February 23, 2019

Explore Life


It's "Things with Wheels" this week at Simon's Monday Challenge so I rubbed Distress Ink (Cracked Pistachio, Faded Jeans, and Dusty Concord) on a manila tag, covered it with Tissue Wrap, pasted on a fussy-cut image (thank you, Vintage Everyday), used a Distress Marker (Old Paper) to tint the dress, and added a Remnant Rub.

My go-to glue these days may surprise you: Elmer's Re-Stick.

I've always used glue sticks for convenience (and you can't beat the price) and even though these are smaller than the kind I was using, the glue dries slowly so you have plenty of time to spread it. And this property allows you to reposition whatever you are pasting which is a big plus too.

February 13, 2019

Happy Valentine's Day


My good friend Thelma (I'm Louise) introduced me to card-making and it's understood that the cards we exchange between ourselves can be an outside-the-box/anything goes kind of flavor. Because there are no rules it makes our tradition that much more fun.

This is the card she will receive tomorrow, made from an assortment of papers (mostly Authentique) including one called "Stitches Two" which is the band running through the center.

The card also includes a hand-colored printable (background heart border) that I distressed and embellished with dots of Scribbles (3D fabric paint). I used an assortment of gel pens for the coloring.


I have a very limited stash of sentiment stamps so this one was taken from an example found on the net. My technique is to print the example, rub a thick coating of graphite (pencil lead) on the back, tape it down with washi and trace over the top of it. This transfers most of the outline of the lettering and then I go back over it with a fine-tipped marker. The heart trio was stamped.

January 27, 2019

She's Changed


My projects from the Tim Holtz Idea-ology Creativation 2019 booth were returned to me yesterday and I made two changes to one of them.

Formerly called Vintage Clip Book #15, she's #13 now (the original Number Token fell off during the take down) and I decided to get rid of the dot border because it just didn't work and wasn't necessary.


The Vintage Clip used for this example is 2-1/2" wide and, as you can see, the book is not much bigger than the clip. I pasted a piece of red paper behind the Number Token to make it stand-out more, added one of the new Hardware Heads and used Gorilla Glue to re-attach it to the clip.

I think the girl with dog is a new Paper Doll image (I haven't seen her before) and she was the perfect size to use with my fussy-cut and Ephemera pieces.

The rest of my projects are in the previous post.

January 24, 2019

Creativation Idea-ology 2019


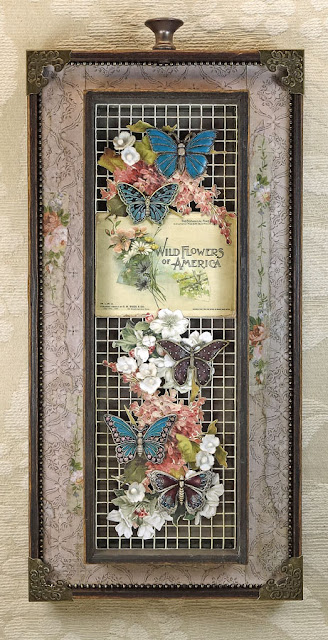
For details on this project (Wildflowers)--here's the link.


For more details on Vintage Clip Book #15 (now #13) see this post.


These are my contributions to the Tim Holtz Idea-ology booth at Creativation 2019.*

There are some terrific new products this year and some of my favorites include the new Ephemera Pack (Keepsakes), the new Layers (Remnants) and of course the Vintage Clips (which I used on small antique books).

There's not much to say that isn't already obvious technique-wise--it's just some fussy-cutting, painting, and pasting. To see the details, click on the photo for a larger view. Be sure to contact me if you have any questions, there's a link to my email address in the sidebar or you can leave me a comment.

Perhaps there will be a blog hop like last year. If that's the case, I'll pick a project and include all the specifics. Do you have a favorite you'd like to know more about? Update 1/29/2019 - There will be a blog hop (with giveaways) scheduled for February 5 hosted again this year by Richele Christensen (californiaARTgirl.blogspot.com) and will include the designers for all of Tim's new products (Idea-ology, Stampers Anonymous, Sizzix, etc.).

Thanks for stopping by and a big thank-you to Paula and Tim for asking me to contribute again this year. If you are interested in seeing my work for the Idea-ology booths from 2015-2018, here's the link.

*The last two pieces did not appear in Tim's video.

December 18, 2018

12 Tags for Christmas 2018 - No. 10 & 11


I'm still looking back to Christmas tags from the past and I've saved some of my very favorite tags for when we get closer to Christmas. This is one of them.

The background is made from mulberry papers and the tree was hand-cut out of kraft paper that had been randomly stamped and embossed to create texture. I added the tinsel using glitter glue and a white gel pen.

The text was cut from a recycled store-bought Christmas card and illustrates just how far I will go when it comes to fussy-cutting. Crazy I know but I loved the style of the lettering and I was several years away from owning a die-cut machine.  Since the text was wider than the tag, I just let it bow out when I attached it to the bottom of the tag.


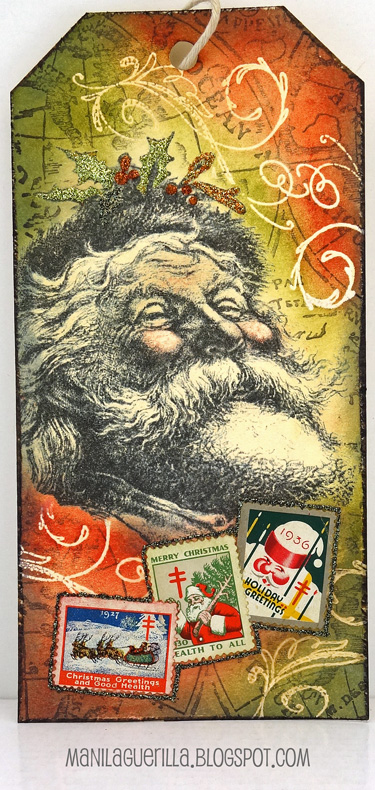
This one's a favorite because of the Thomas Nast Santa (an image transfer). It's an early example of learning how to blend Distress inks, how to emboss (the white scrolls) and how to use masks when stamping.

If you don't recognize the kind of stamps I used at the bottom of the tag they are called Christmas Seals. I inherited a small collection from my Great Aunt Esther, they're a terrific embellishment--I must remember to use them more often!

November 28, 2018

12 Tags for Christmas 2018 - No. 4 & 5

I started making tags when I discovered Tim Holtz and his blog at the beginning of December 2009 and got caught up in his daily posts for the 12 Tags of Christmas.

I had little experience stamping, didn't know about Distress inks, and his tutorials were very detailed and very helpful. I was mesmerized and I was hooked.

Tim has kept links to these posts on the sidebar of his blog and I recommend them to paper crafting beginners as a learning tool--they are so much fun!

I've decided to share a few of the tags I made during this period (before Beulah Bee) because I'm a little short on time this year and won't be able to complete all 12 new ones.


This one shows my penchant for paper-cutting even back then but before I learned to tint the cut paper edges with a darker shade of ink (so they would blend in better). Scraps of pages from an old German bible were pasted on the background.


I used the same image on this tag (photocopied from a vintage greeting card that belonged to my Great Aunt Esther) and embellished it with a stamp embossed frame using antique gold powder.

The background is Tim Holtz kraft card stock and the tiny stars were recycled from a store-bought card and tinted with alcohol ink.

I could never have imagined back in 2009 that this year I'd be short on time making tags because of working on projects for Tim's Idea-ology booth at the January 2019 Creativation trade show!

What a journey (thanks, Tim)!

There are links in the sidebar to my Creativation/CHA projects or Christmas tags from past years.

November 11, 2018

12 Tags for Christmas 2018 - No. 1


I've started my tags for Christmas and, with any luck, I'll have twelve completed before December 24 (fingers crossed).

I've had a little trouble with my mojo (or muse as some would call it) so I'm going back to basics to embrace some of the original techniques that influenced my paper crafting journey.

I'm sharing my step-outs for this one, with minimal explanation, so don't hesitate to comment if you have a question about my technique.

And if you'd like to see any of my tags from Christmas past I've put a link to them in the sidebar.

Oval drawn on Speciality Stamping Paper, matt finish (Ranger)

Stamp (Penny Black) with Distress (Fired Brick)

Spread ink with water brush

Stamp greeting (Penny Black) then mask it along with flower

Stamp background with archival ink (Potting Soil)

Rub on Distress inks (Forest Moss, Peacock Feathers) and spritz with water

Cut out oval with X-acto knife.

Re-apply Fired Brick Distress ink to strengthen flower color.
Add a paper background behind flower.

Trim oval with dimensional dots and tag edge with black marker


After I'd cut out the oval, it was fun playing with different papers for the background and I finally settled on a paper that matched the Peacock Feather blues.

I'm linking this to Simon's Monday challenge blog because this week's theme is Make Your Own Background and also to the Penny Black Creative Christmas Challenge.

September 29, 2018

Simply Discover


You'd think working in monochrome would be easy--yes? I have found it to be easier said than done.

And so, for this week's linkup to Simon's Monday challenge, I took the easy way out and went with a black and white theme.

It started with a background paper (Paper Studio B/W Abstract), layered under a page trimmed for the base from Prima called Epiphany.

The luna moth was printed from some clip art then cut-out and pasted and embellished with gray paint and black and white pens (Sakura gelly rolls and Pitt big brushes).

There's a little washi tape, some Remnant Rubs, and a stamp from a set by Tim Holtz called Stamp Collector.

One of my favorite tools used for the black shading around the moth is a Derwent Sketching pencil--Dark Wash 8B.

August 17, 2018

My Blue Shoes


Another digital photo just begging to be altered (thanks again, Vintage Everyday) and, in this case, in a most unconventional fashion. But I truly celebrate these type of creations because they conform to no one and are purely me.

And it's been awhile since I've made a tag and they're very therapeutic!

August 11, 2018

It's Tape


This is made with tape--washi/design tape, whatever you want to call it, placed in strips or torn into pieces and, where there were windows, covered over with tissue paper.

What could possibly have inspired me to do this?! It started with a photo found on the net (thanks, Vintage Everyday).


After printing, I began to cut away sections and then set it away for awhile, not sure where to go with it but I knew collage would be a part of it.


Then along came a prompt from Simon's Monday Challenge Blog where this week's theme was to add some tape to whatever you make.

Okay, so I went a bit overboard but it was an interesting personal challenge and if I ever use this technique again in a more serious way, I did learn how to best manage the properties of the tape (slick surfaces, sealing, etc.).

I won't share them with you as I doubt anyone would ever do something as crazy as this.

July 28, 2018

Christmas in July


Simon's Monday challenge was prompted by a special blog hop and a chance to win some crafting goodies, but Christmas in July--really?


While it was hard to "get in the spirit" when we've had record-breaking high temps this week, I accepted the challenge and here's my entry.


My card may be a little unconventional so I thought you'd appreciate a peek at the main ingredients before I applied a wash of gesso and then Distress Oxide (Peeled Paint) to create the background.


It would be difficult to pull this off without using a strong backing so I pasted the collage onto some thin packaging material which would be cut to size near the end.


Some Liquid Pearls (Ranger) were dotted around the oval, the backing was trimmed and then I pasted brown mulberry paper (because it's thin) on the back to frame it. Before mounting on folded cardstock, I stitched around the border.

The poinsettas were cut out of Graphic 45 Winter Wonderland, the bird is from Wallflower and the calendar page is from Tidings (Tim Holtz Paper Stash).

I used a glue stick for everything except the poinsetta (attached using spray adhesive) and the final mounting (double-sided cellophane tape).

July 27, 2018

Minnie Nolan's Boarding House


My grandmother had a habit of writing on photographs of family members. While maybe not great for the appearance, I do appreciate the documentation.
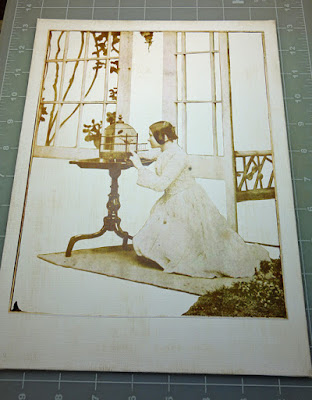
This photo was the kind that is printed on a postcard. It was identified as "Minnie Nolan's first boarding house in Kansas City."

I used the actual photo (rather than a copy) with its wrinkles, writing and a missing corner and applied a thin wash of off-white acrylic paint to block out the background.

It was mounted behind an Idea-ology Collage Frame dressed up with various pieces of Tim Holtz paper stash (the vines were cut from Wallflower).


The polka dots (Tim Holtz Dots & Floral) were stamped on his new Plain Collage Paper and layered over the upper left corner. I made dots around the oval with Scribbles (3D fabric paint) and distressed some metallic numbers to blend in with the overall color scheme.


I cut a piece of book board to cover the back and painted the edges. I trimmed the frame's border with lines of black and gold metallic inks.


The butterflies are some digital clipart that I printed on vellum and cut-out. The word "legacy" is a Remnant Rub.

I don't think Grandma Nell would mind what I did with her photo, it's better preserved now and her notes have been transferred to the back of the frame.

July 08, 2018

Beautiful


A recent purchase (Beautiful Flowers stamp set by Simon Says Stamp) has captured my interest more than most these days. The main flower grouping is really fun to experiment with and the detail is exceptional.

This time, I've stamped the image onto old book paper using brown ink. After it was fussy-cut, I mounted it on a background made with papers from the Wallflower Paper Stash and trimmed it with washi tape.

I filled in the embossed text with white Perfect Pearls and also dabbed it on the flower centers and some of the stamen.

May 29, 2018

Extra Ordinary Joy


Embracing the old and the new and some extra-ordinary joy with this tag, made on-the-fly today because I could and I did.

I have a lot of side-projects going on related to reorganizing my crafting space. Like converting some favorite wooden stamps to cling now that I have a stamping platform. I tested one of them today (French Collage) using a Big & Juicy stamp pad (remember these?) on a manila tag. And I just couldn't leave well enough alone. So....

I curated a Found Relative (the latest release has new images) and fussy-cut it like I used to before there were Paper Dolls.

I cut out some images from a newly purchased stamp set called Stamp Collector, then foraged around for more paper bits and found the leaf/vine cutting and the polka dot paper (I save most of my scraps).

Put it all together with a glue stick, add some Remnant Rubs and Scribbles (the dotted border) and there you have it. Extra Ordinary Joy!

April 26, 2018

Polyommatus Theo


This moth was clipped from some vintage Tim Holtz kraft paper and it was labeled as a "Polyommatus Theo." Now you know.


It became a decoration for this greeting card made from other Tim papers as well as an old book page. I seldom add sentiments so I can use the card for any occasion.


The flowers (Stampers Anonymous Flower Garden set) had another life before they became a part of this card. When a tag I was working on turned south, I cut them off the tag and reused them.


I used a transparent white paint to fill-in the flowers and the Distress inks underneath bled through. This explains the coloring you see in the final piece.

The text stamp is Stamper's Anonymous Ledger Script and the dots are Perfect Pearls and there's also a bit of machine stitching (something you don't see on a store-bought card).

I'm linking to Simon's Monday Challenge blog for this week's theme which is Flower Power.